HYPATIA User Guide
-
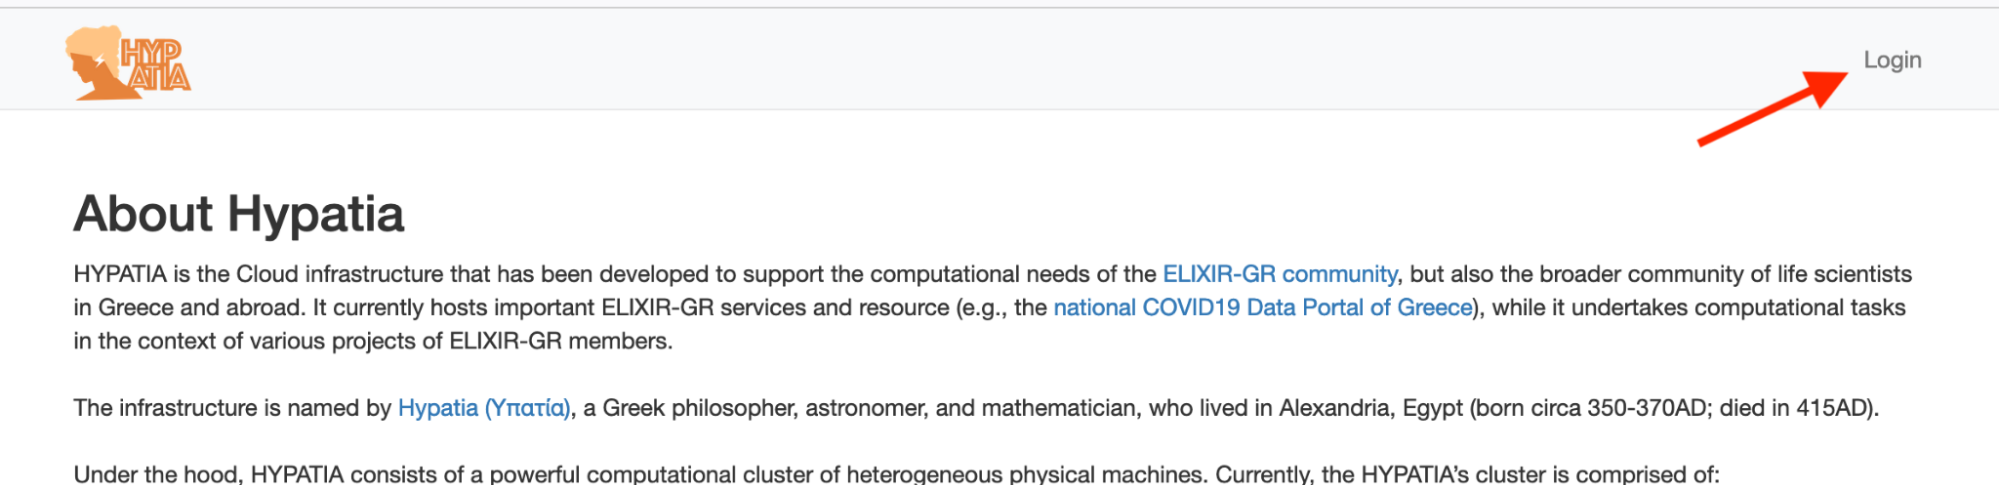
How to connect
-
User & Project types
-
Creating Projects
- How do I create a new project?
- How do I create a new “24/7 services” project?
- How do I create a new “On-demand batch computations” project?
- How do I create a new “On-demand computation machines” project (available only to gold users)?
- How do I create a new “On-demand notebook” project?
- How do I create a new “Storage volume” project?
-
Project Management
- What happens after I submit a project request?
- Why did I get a notification saying my project was automatically accepted?
- What happens when my project is close to the expiration date?
- How do I update my projects?
- Is there a list of all my previous requests?
- I forgot to update my project expiration date and it expired. What can I do?
- How do I view details about my projects?
-
Virtual Machines (VMs)
- My project was approved. How do I access the resources?
- How do I create a VM (24/7 services, on-demand computation machines)?
- What are the connection details for my VM?
- Can I stop/start or reboot my VM?
- How do I access my VM via the default console?
- How do I delete a VM?
- How do I activate the copy of Windows Server 2019 on my VM?
- How do I create multiple VMs (On-demand compute machines)?
-
Storage Management
-
Feedback and Policies
Welcome to the HYPATIA User Guide. This guide provides instructions on using HYPATIA's cloud infrastructure to support your computational needs. Click here to get started or explore the sections on the left for specific topics.
What are the available user types in HYPATIA?
HYPATIA users are classified into the following types based on their role within their organization:
Upgrading Your Account
To upgrade from Bronze to Silver or Gold, click here to submit a ticket request. Please include your position and your team’s Principal Investigator (PI) in your request.
What project types exist in HYPATIA?
24/7 services projects. This type of project is suitable for hosting 24/7 services, following the Virtual Private Server (VPS) model. The focus is on relatively lightweight services (e.g., Web server, API endpoint, database); computationally intensive projects should be served by “on-demand batch computations” or “on-demand computation machine” projects (see below).
On-demand batch computations projects. This type of project is suitable for batches of computational tasks to be executed. Each computational task could involve the execution of a particular software product or of a workflow that combines many software products.
On-demand computation machines projects. This type of project is suitable for (short-term) computational experiments that are not containerised. A VM having particular characteristics is provided to the user. It is available only for gold users.
On-demand notebook projects. Provide customizable, pre-configured Jupyter environments tailored for interactive data analysis in fields like data science and machine learning, with flexible core and memory allocations, limited project durations, and extension options based on resource availability.
Storage volumes projects. This type of project is suitable for creating storage volumes that can be attached to VMs that belong to “24/7 services” or “On-demand computation machines” projects. Storage volumes for “On-demand computation machines” projects are only available to gold users.
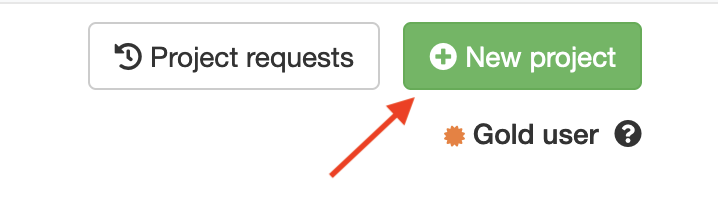
How do I create a new project?
Press the “New project” button on the top right corner:
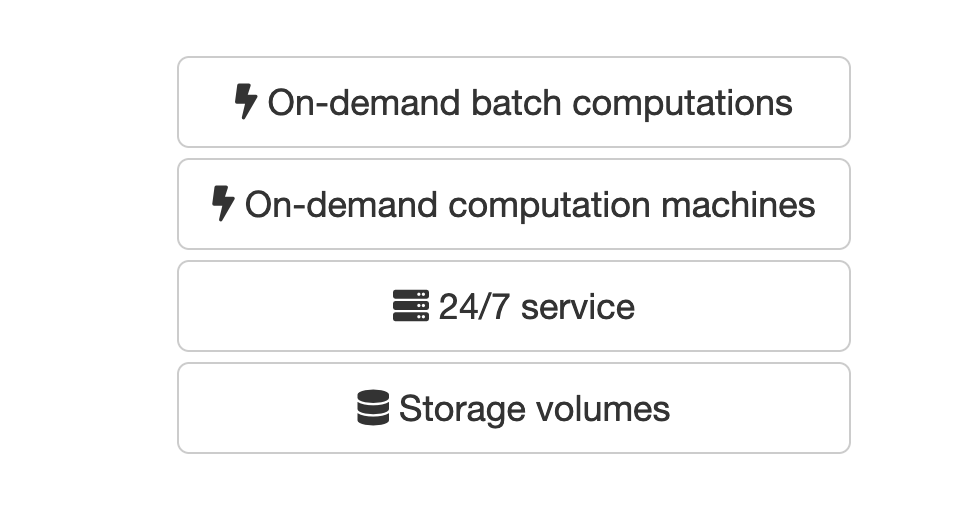
The system will load a new page where you can select the project type you need:
How do I create a new “24/7 services” project?
Press on the “24/7 service button” on the new project page. The following screen will appear:
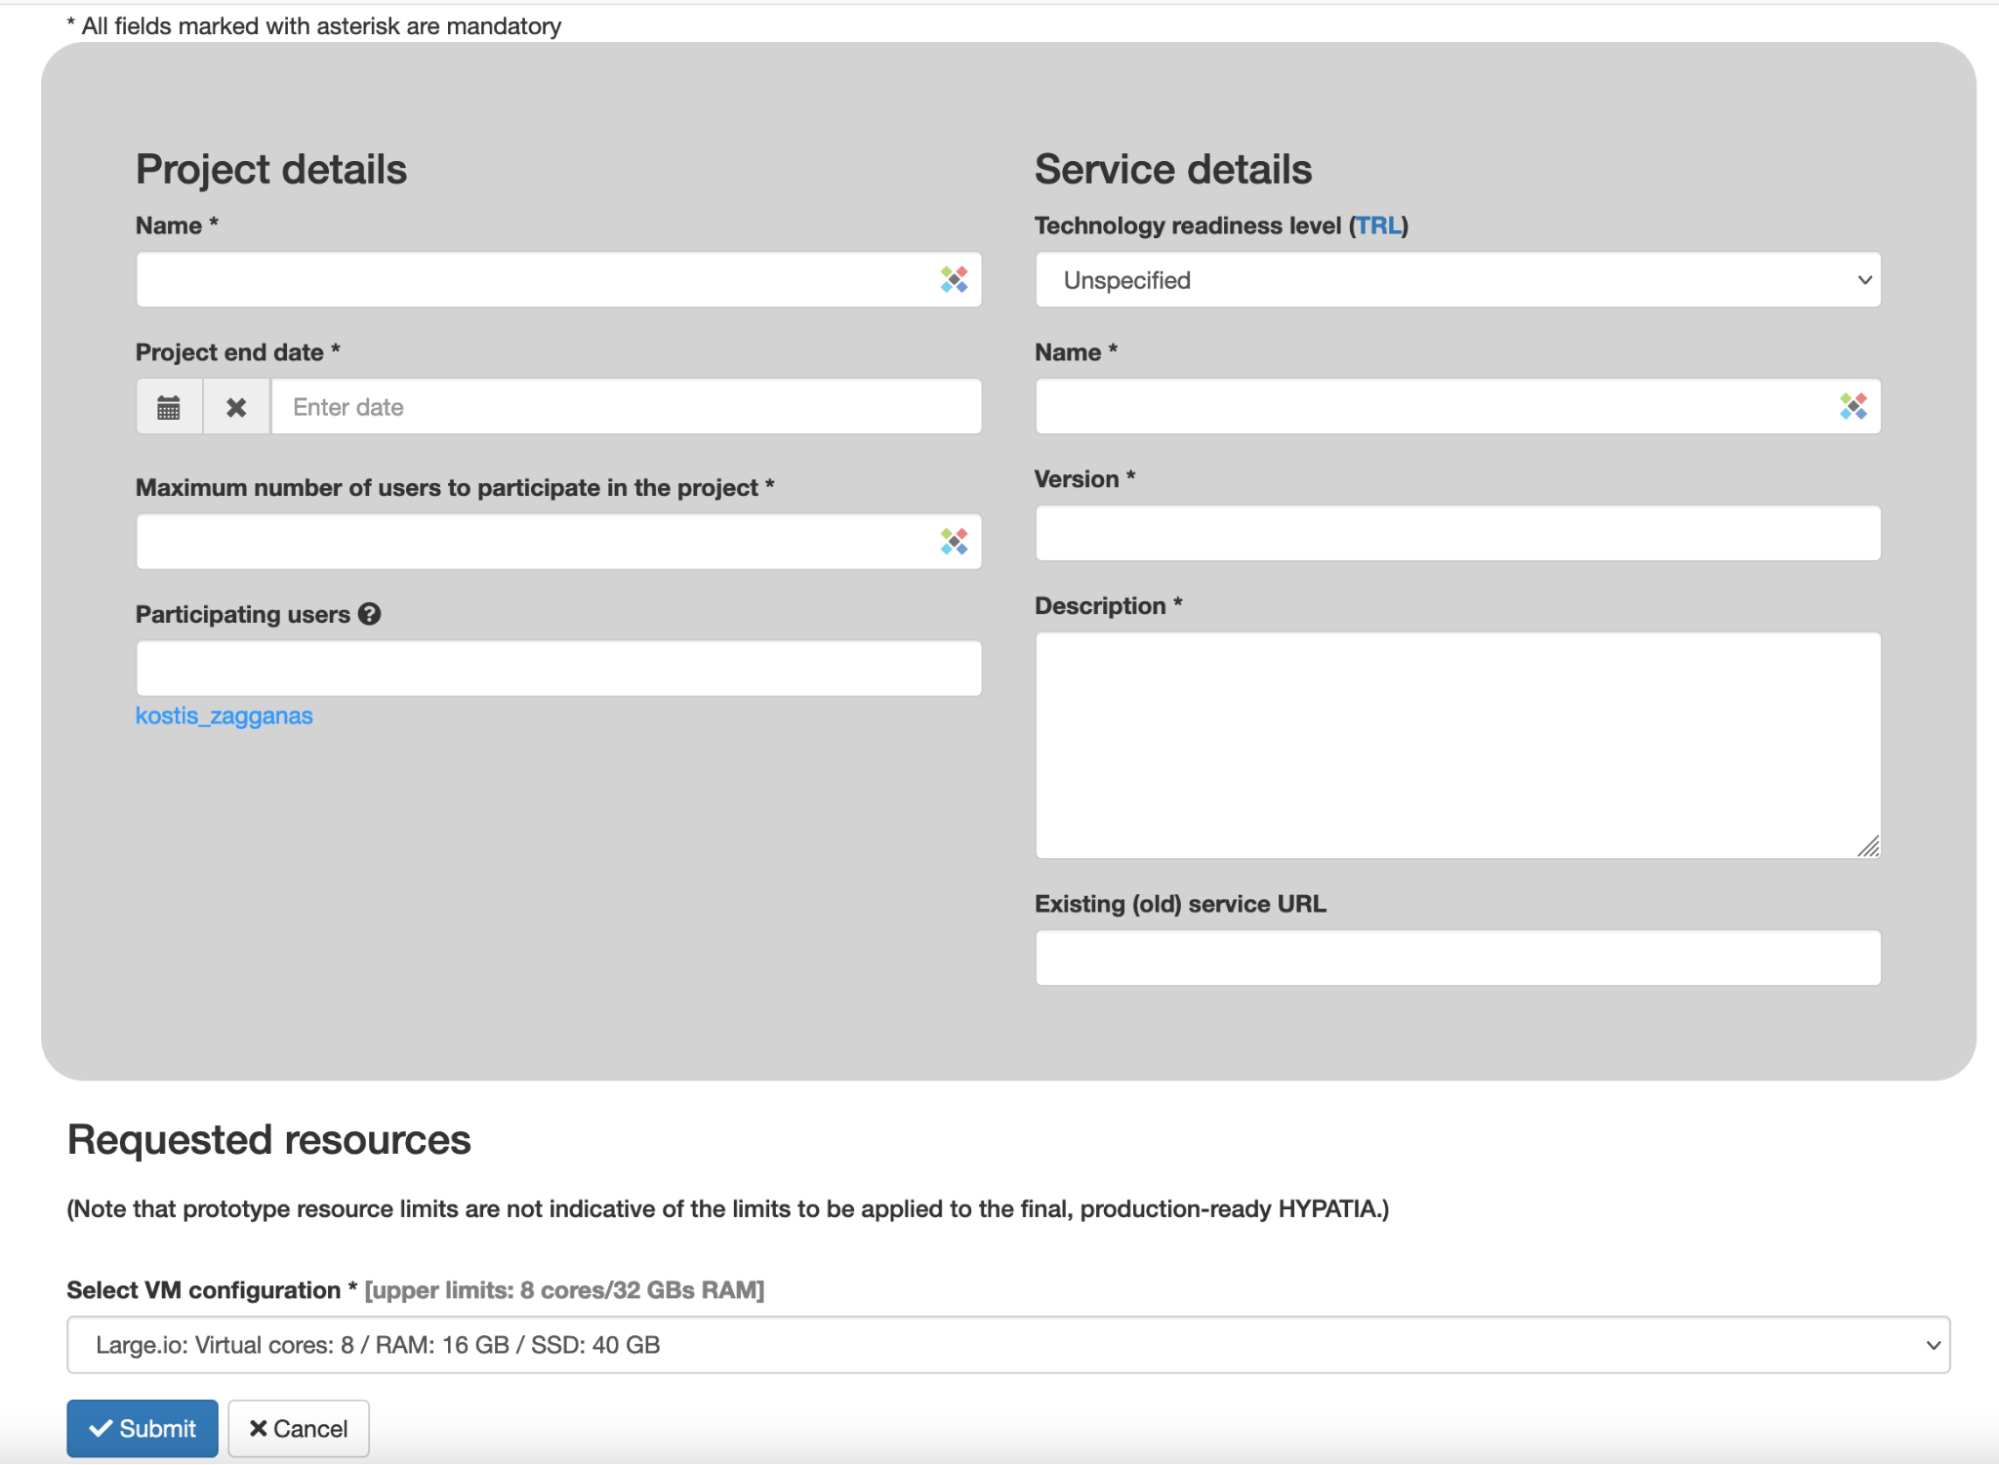
You then need to fill in the required information and click on the submit button:
- Name: The name of the project .
- End date: Use the pop-up calendar to provide an ending date for the project.
- Maximum number of participating users: Select the maximum number of users, who need to access the project’s resources.
- Participating users: Enter the usernames of the users you would like to add as participants and select the appropriate value from the auto-complete box.
- Technology Readiness Level (TRL): read more here: https://en.wikipedia.org/wiki/Technology_readiness_level.
- Name of the 24/7 service: name of an existing or proposed service, to which the requested resources will be allocated.
- Version of the 24/7 service: version of the service.
- Description of the 24/7 service: Write a short description regarding the existing/proposed service.
- Existing service URL: A URL to the existing service (if applicable).
- VM configuration: Select one of the available configurations for the VM you would like to create. (IMPORTANT: VMs with Solid State Disk (SSD) use ephemeral storage and therefore, we cannot guarantee the safety of the data).
How do I create a new “On-demand batch computations” project?
Press on the “On-demand batch computations” project on the new project page. The following screen will appear:
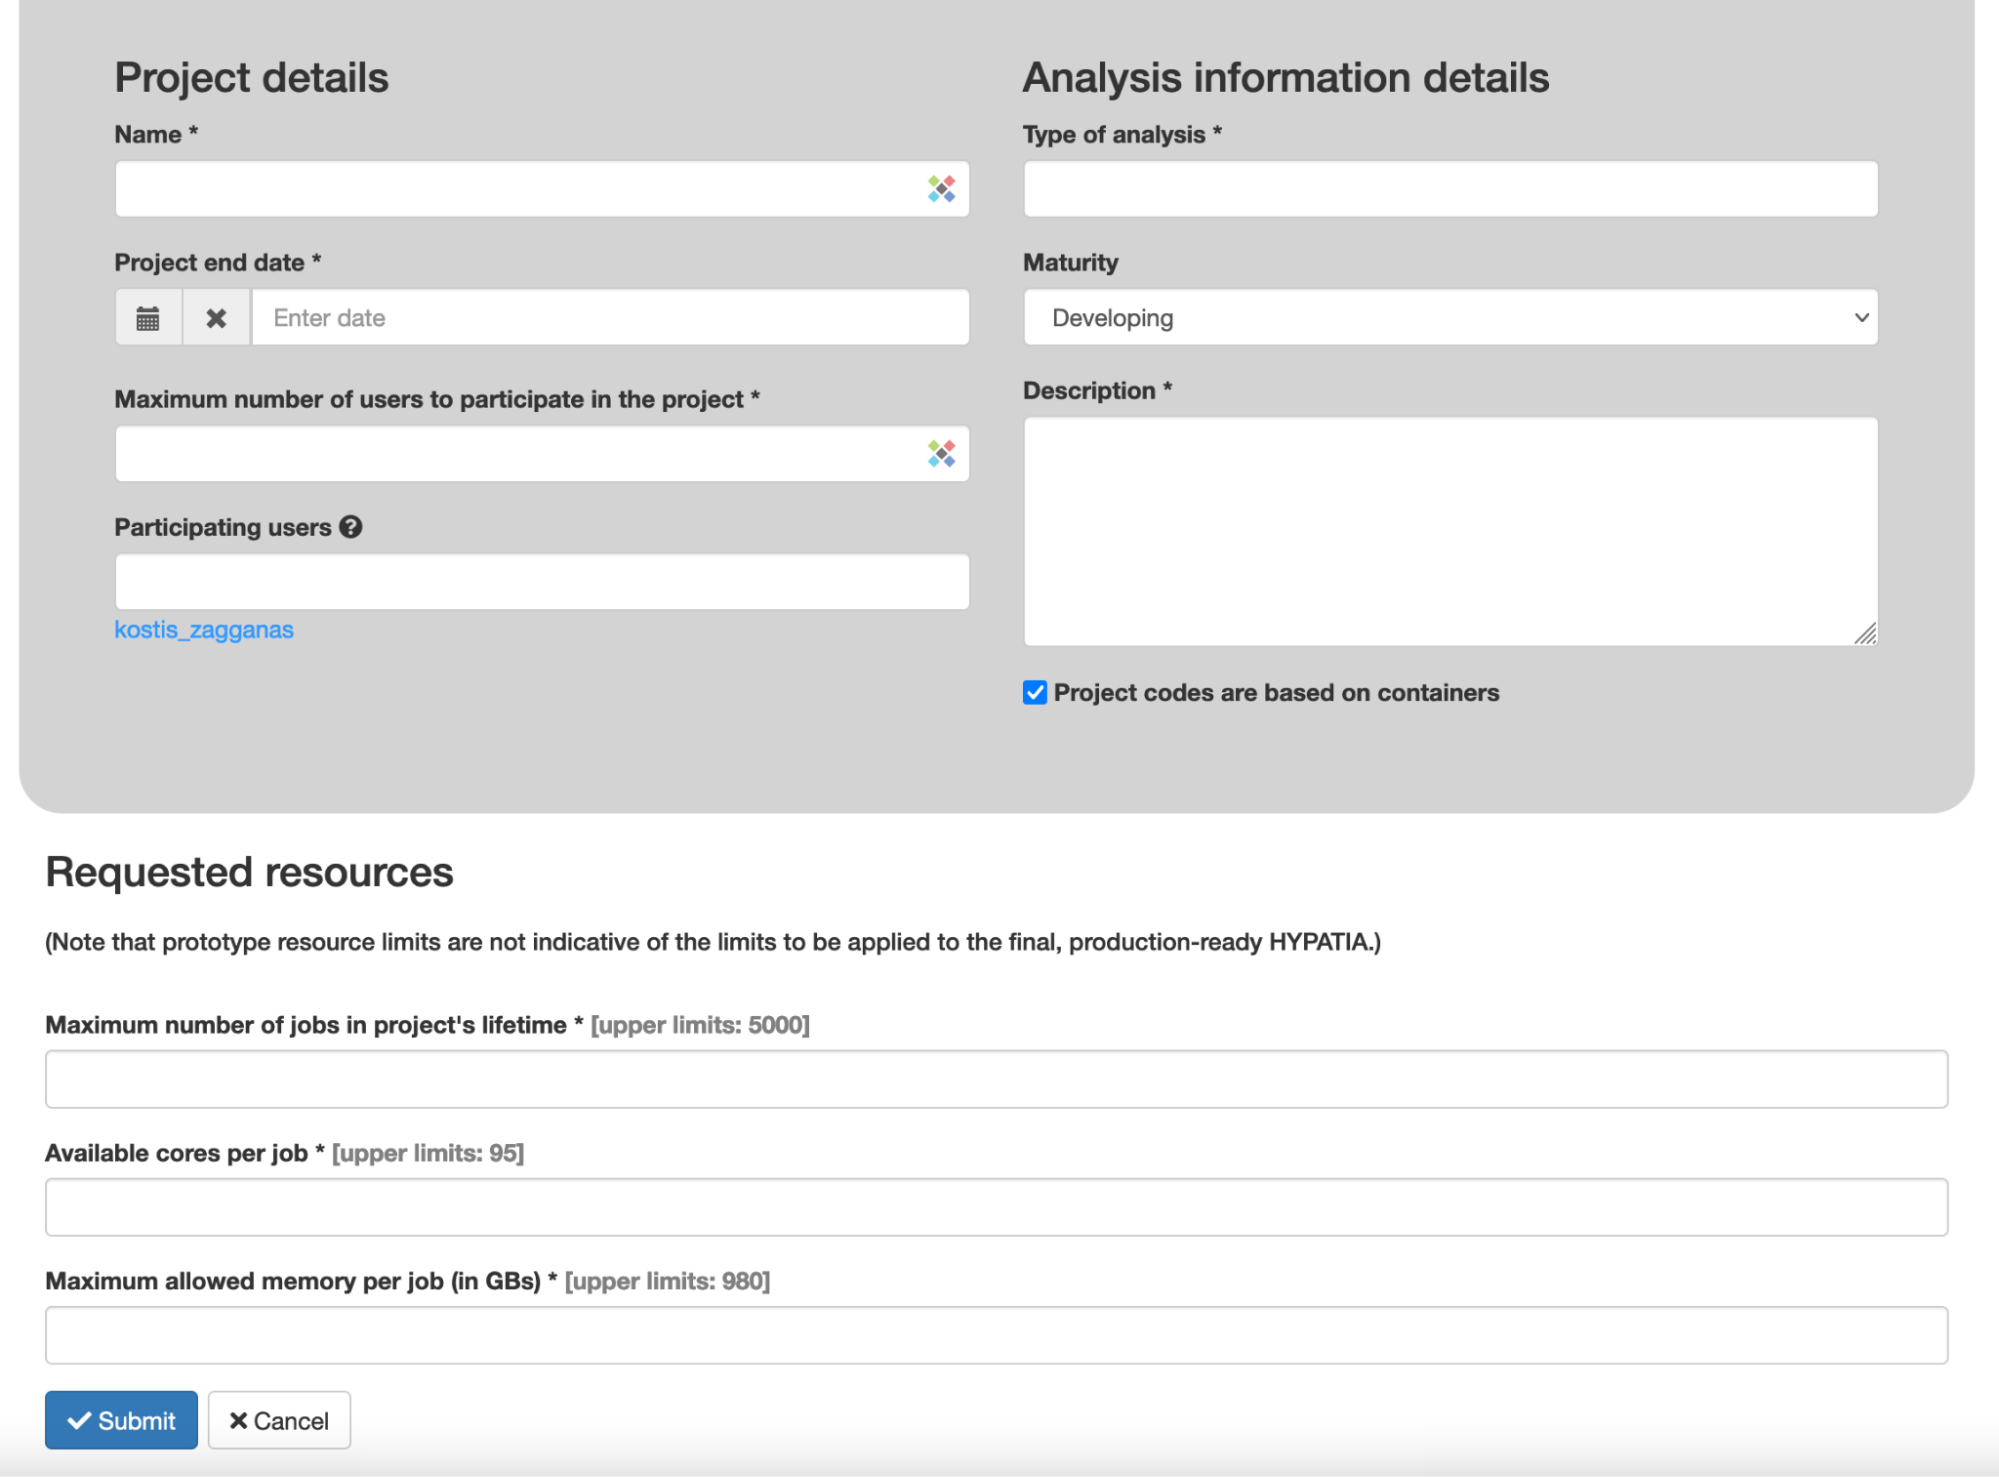
You then need to fill in the required information and click on the submit button:
- Name: The name of the project
- End date: Use the pop-up calendar to provide an ending date for the project
- Maximum number of participating users: Select the maximum number of users, who need to access the project’s resources.
- Participating users: Enter the usernames of the users you would like to add as participants and select the appropriate value from the auto-complete box.
- Type of analysis: The type of analysis you would like to perform using containerized software.
- Maturity: Select the appropriate maturity level of the analysis
- Description: Write a short description of what the analysis does.
- Maximum number of jobs: The maximum number of jobs that will be run on HYPATIA-COMPUTE.
- Available cores per job: The maximum number of virtual cores that will be allocated per job.
- Maximum allowed memory: The maximum number of Random Access Memory (RAM) that will be allocated per job.
How do I create a new “On-demand computation machines” project (available only to gold users)?
Press on the “On-demand computation machines” project on the new project page. The following screen will appear:
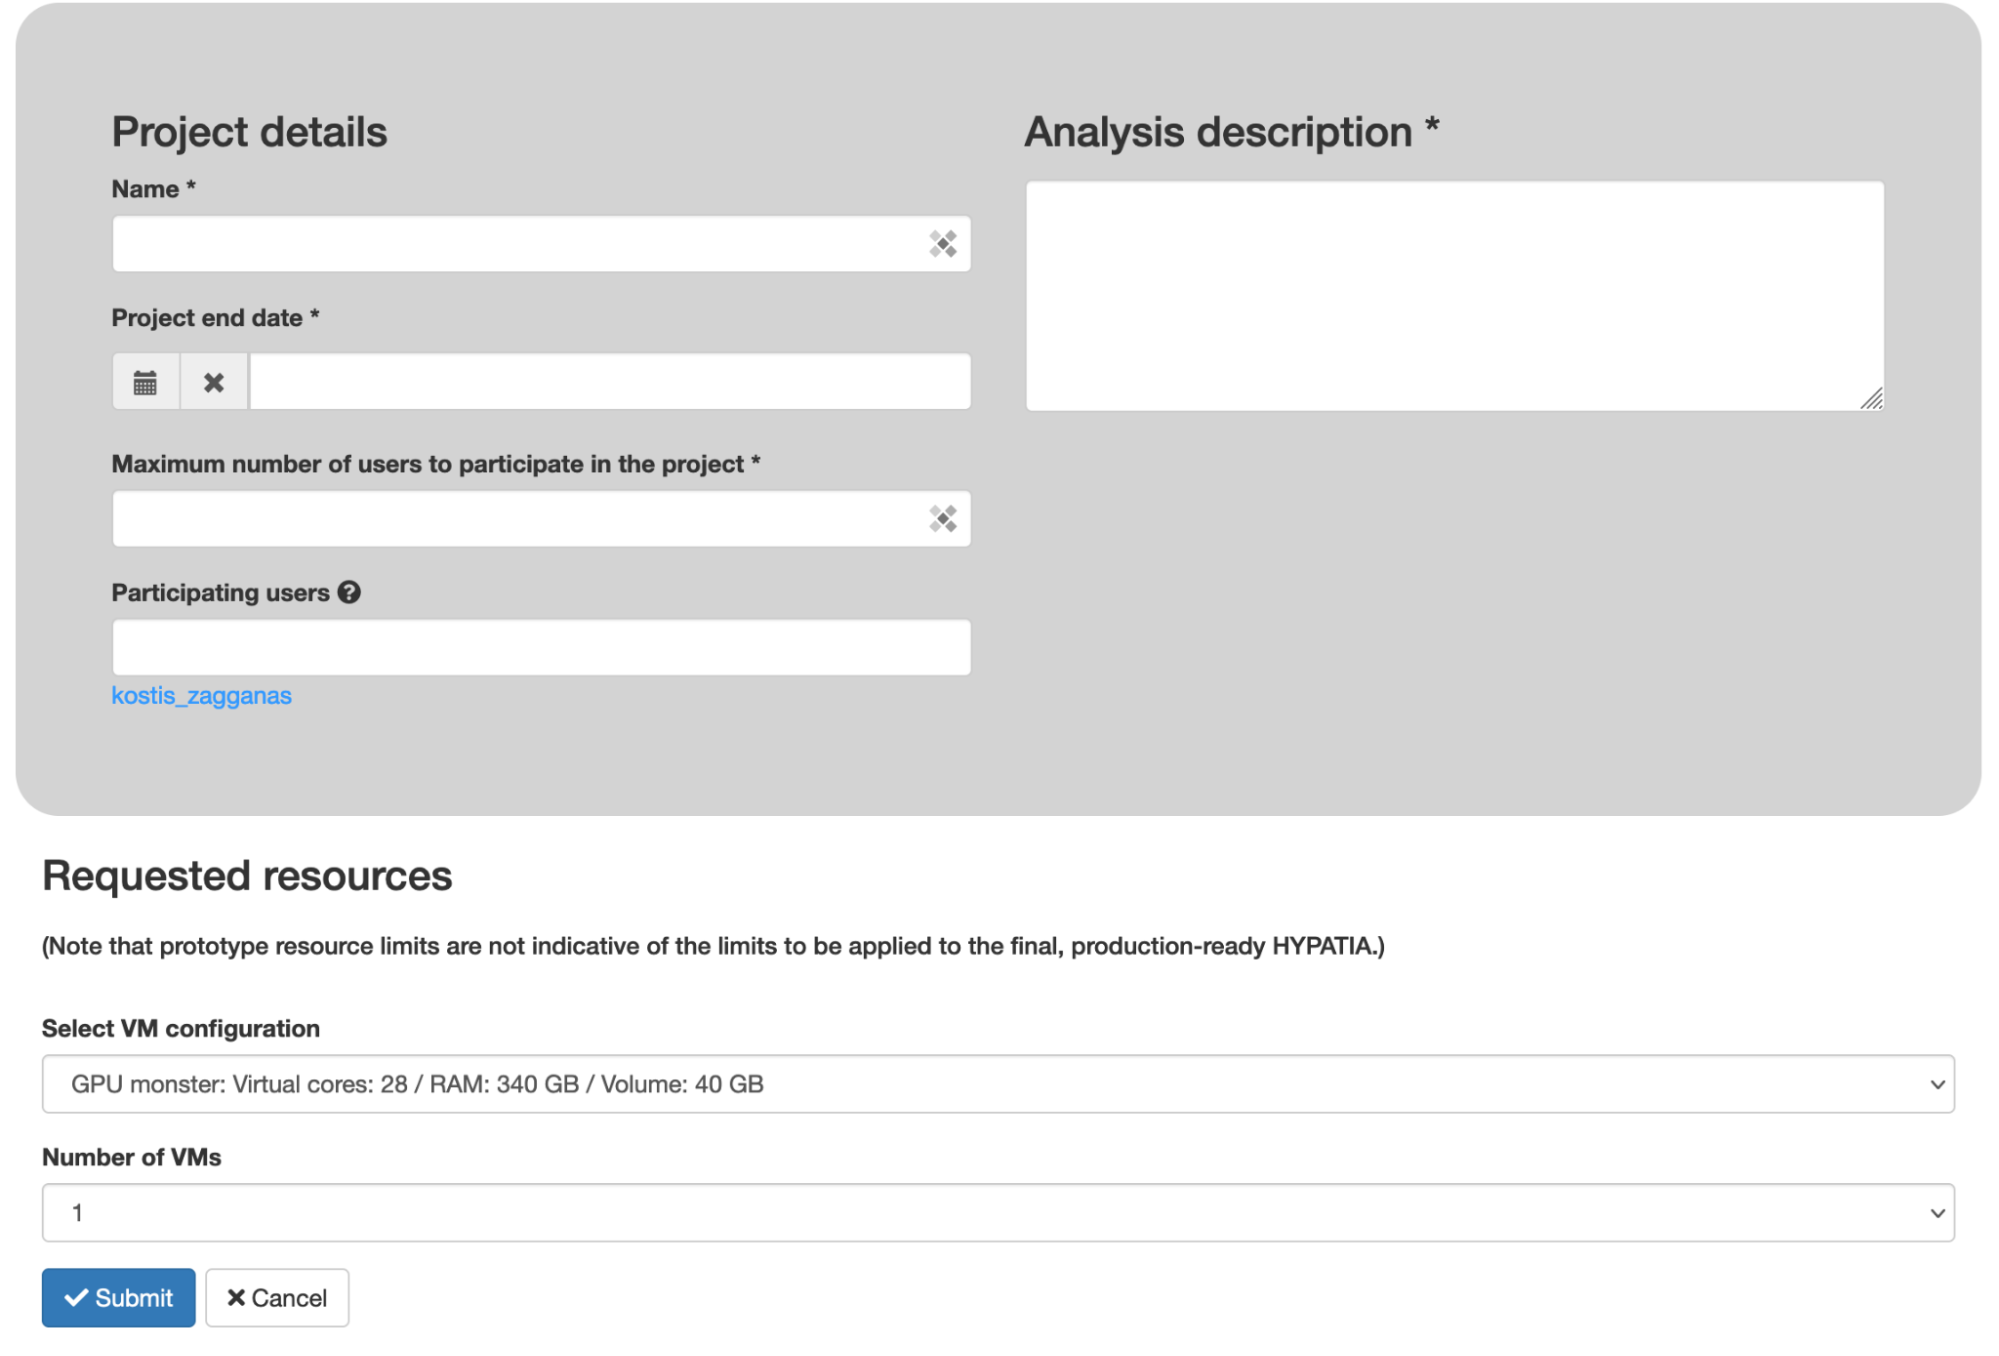
You then need to fill in the required information and click on the submit button:
- Name: The name of the project.
- End date: Use the pop-up calendar to provide an ending date for the project. Keep in mind that you cannot select a date that is later than 30 days.
- Maximum number of participating users: Select the maximum number of users, who need to access the project’s resources.
- Participating users: Enter the usernames of the users you would like to add as participants and select the appropriate value from the auto-complete box.
- Analysis description: A short description of the analysis that will be performed on the VM.
- VM configuration: select one of the available configurations for the VM you would like to create. (IMPORTANT: VMs with Solid State Disk (SSD) use ephemeral storage and therefore, we cannot guarantee the safety of the data).
- Number of VMs: When a number of smaller VMs are required, then you can select up to 30 VMs.
HHow do I create a new “On-demand notebook” project?
Press on the “On-demand notebook” project on the new project page. The following screen will appear:

You then need to fill in the required information and click on the submit button:
- Name: The name of the project.
- End date: Use the pop-up calendar to provide an ending date for the project. Keep in mind that you cannot select a date that is later than 30 days.
- Maximum number of participating users: Select the maximum number of users, who need to access the project’s resources.
- Participating users: Enter the usernames of the users you would like to add as participants and select the appropriate value from the auto-complete box.
- Description: A short description.
- Jupyter server type: The type of Jupyter server you would like to perform.
- Available cores: The maximum number of cores that will be allocated per server.
- Maximum allowed memory: The maximum number of Random Access Memory (RAM) that will be allocated per server.
How do I create a new “Storage volume” project?
Press on the “Storage volumes” project on the new project page. The following screen will appear:
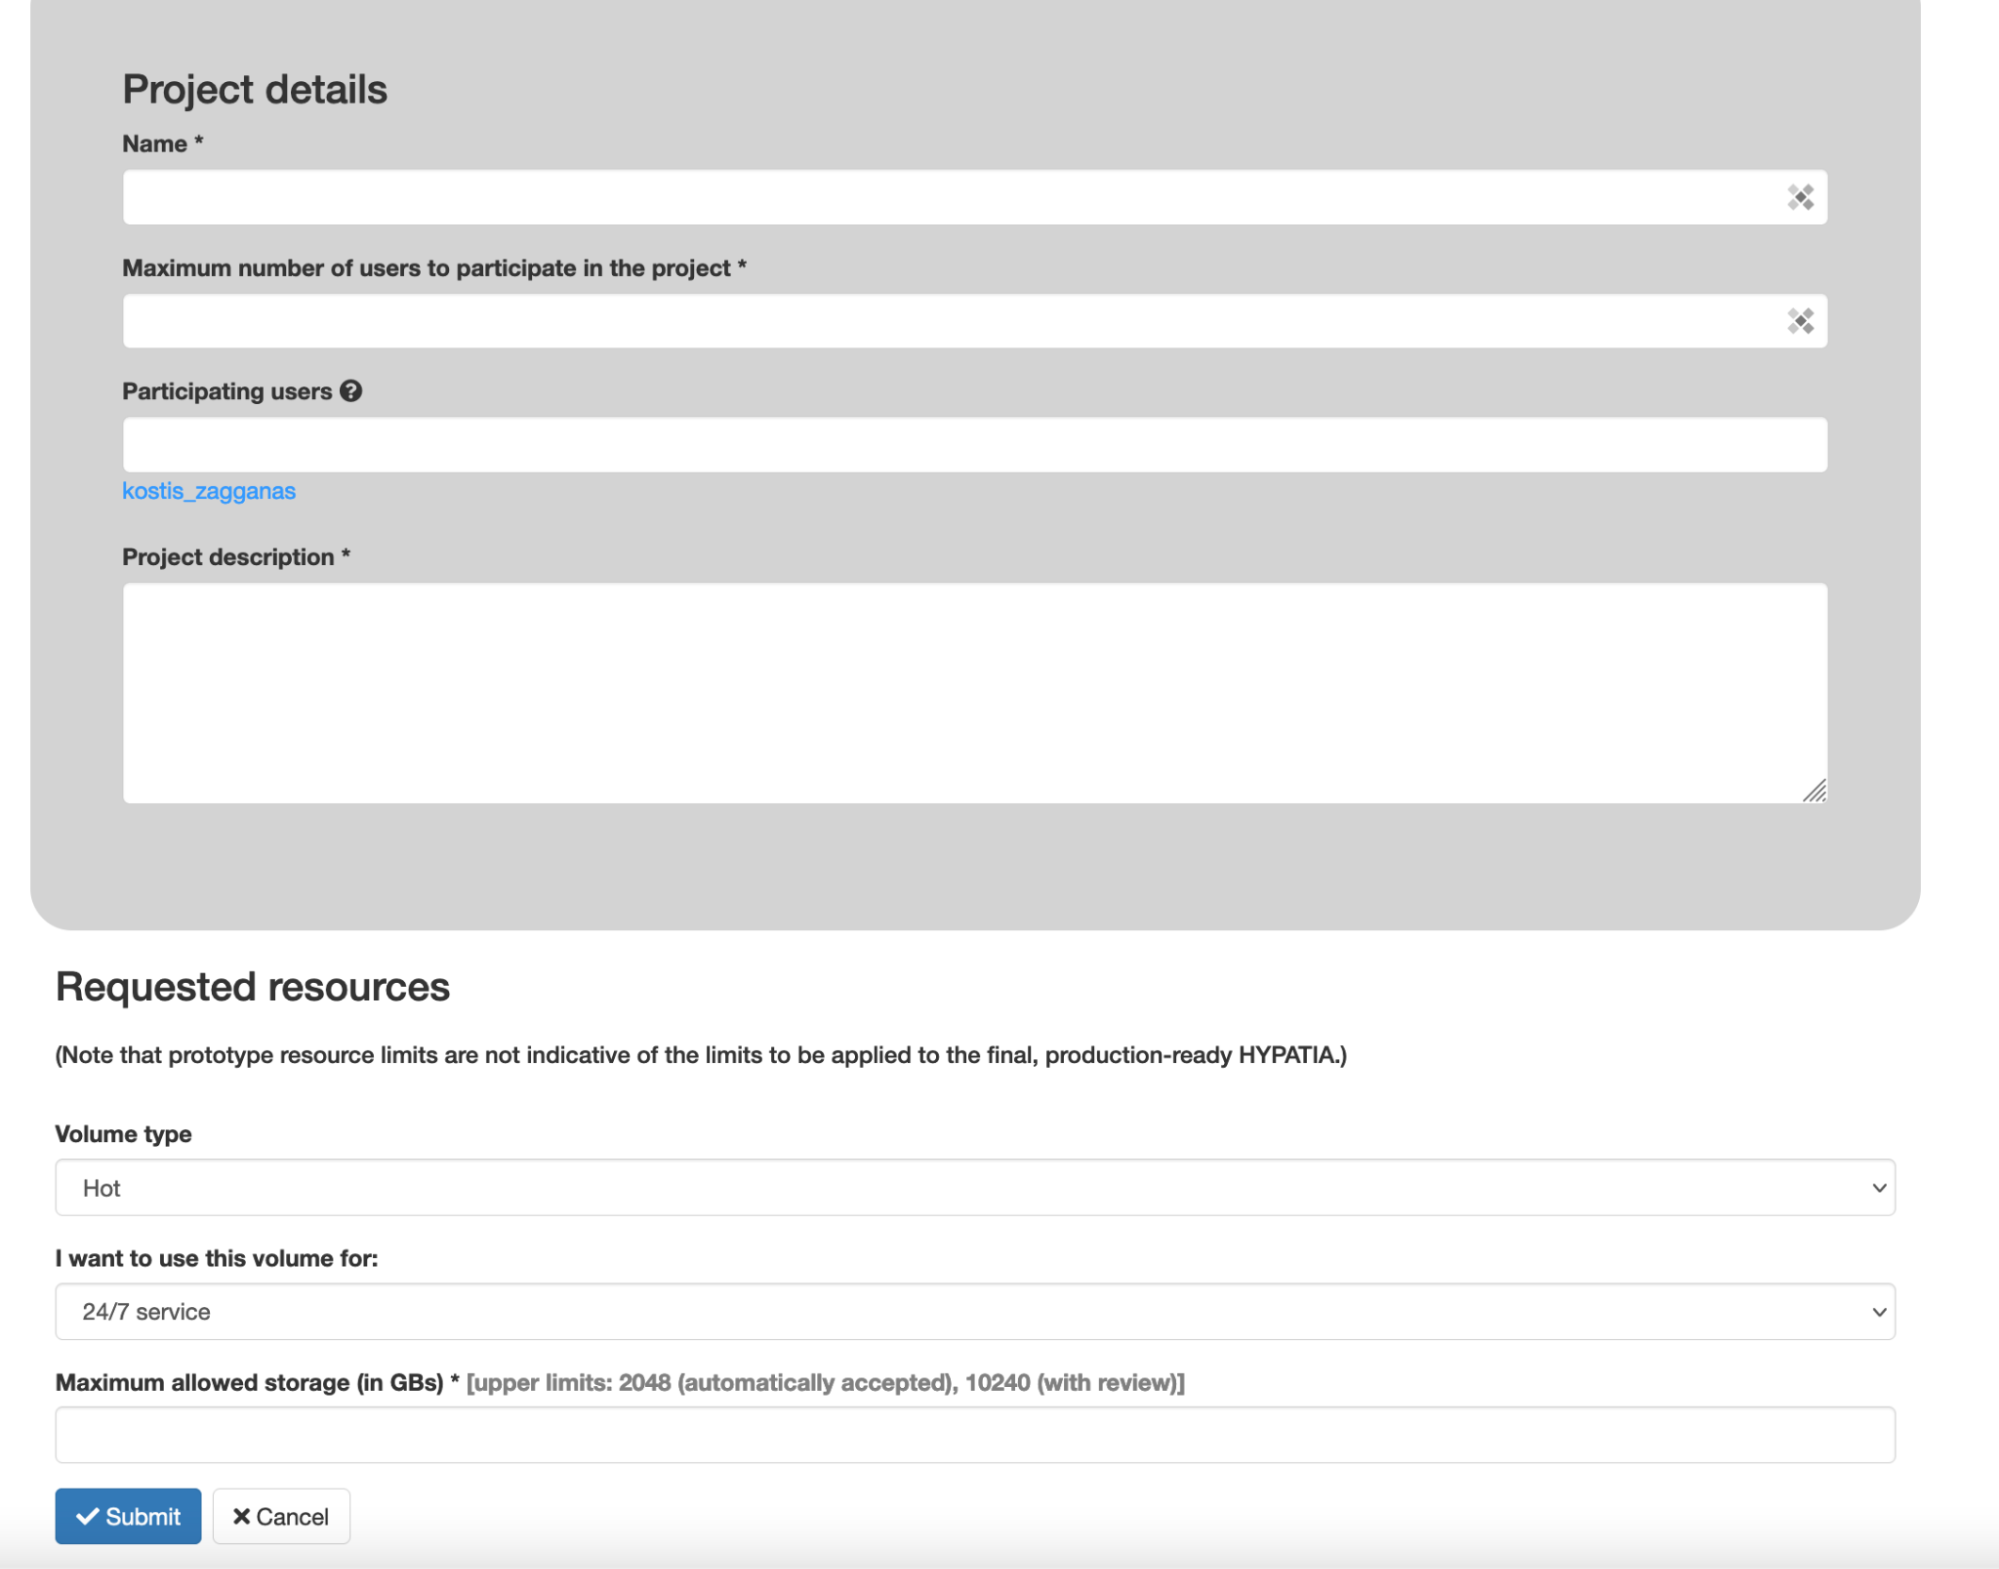
You then need to fill in the required information and click on the submit button:
- Name: The name of the project.
- Maximum number of participating users: Select the maximum number of users, who need to access the project’s resources.
- Participating users: Enter the usernames of the users you would like to add as participants and select the appropriate value from the auto-complete box.
- Description: A short description.
- Volume type: At the moment, only “hot storage” is supported.
- VM type: Storage projects can be created for 24/7 service VMs as well as on-demand computation machines VMs (available only to gold users). Note that, after submission the VM type cannot be changed.
What happens after I submit a project request?
After you submit a project request, it is reviewed according to the access policy of HYPATIA. Once a decision is reached you will get notified on the website. If you would like to receive notifications via e-mail, then enter your e-mail address in the system (see question: “How do I get notifications by e-mail instead of only on the interface”).
Why did I get a notification saying my project was automatically accepted?
Each user has a limited number of Automatically Accepted Projects (AAPs), i.e., projects that can be accepted without review: bronze users may create up to 1 AAP, silver users up to 3 AAPs, gold users up to 3 AAPs. On-demand compute machines projects are not automatically accepted.
What happens when my project is close to the expiration date?
You will get notifications on the interface 30, 15, 5 and 1 day before expiration. If you would like to receive notifications via e-mail, then enter your e-mail address in the system.
How do I get notifications by e-mail instead of only on the interface?
You need to select “User options” from the top menu and then “Email notifications”. You will see the following page:
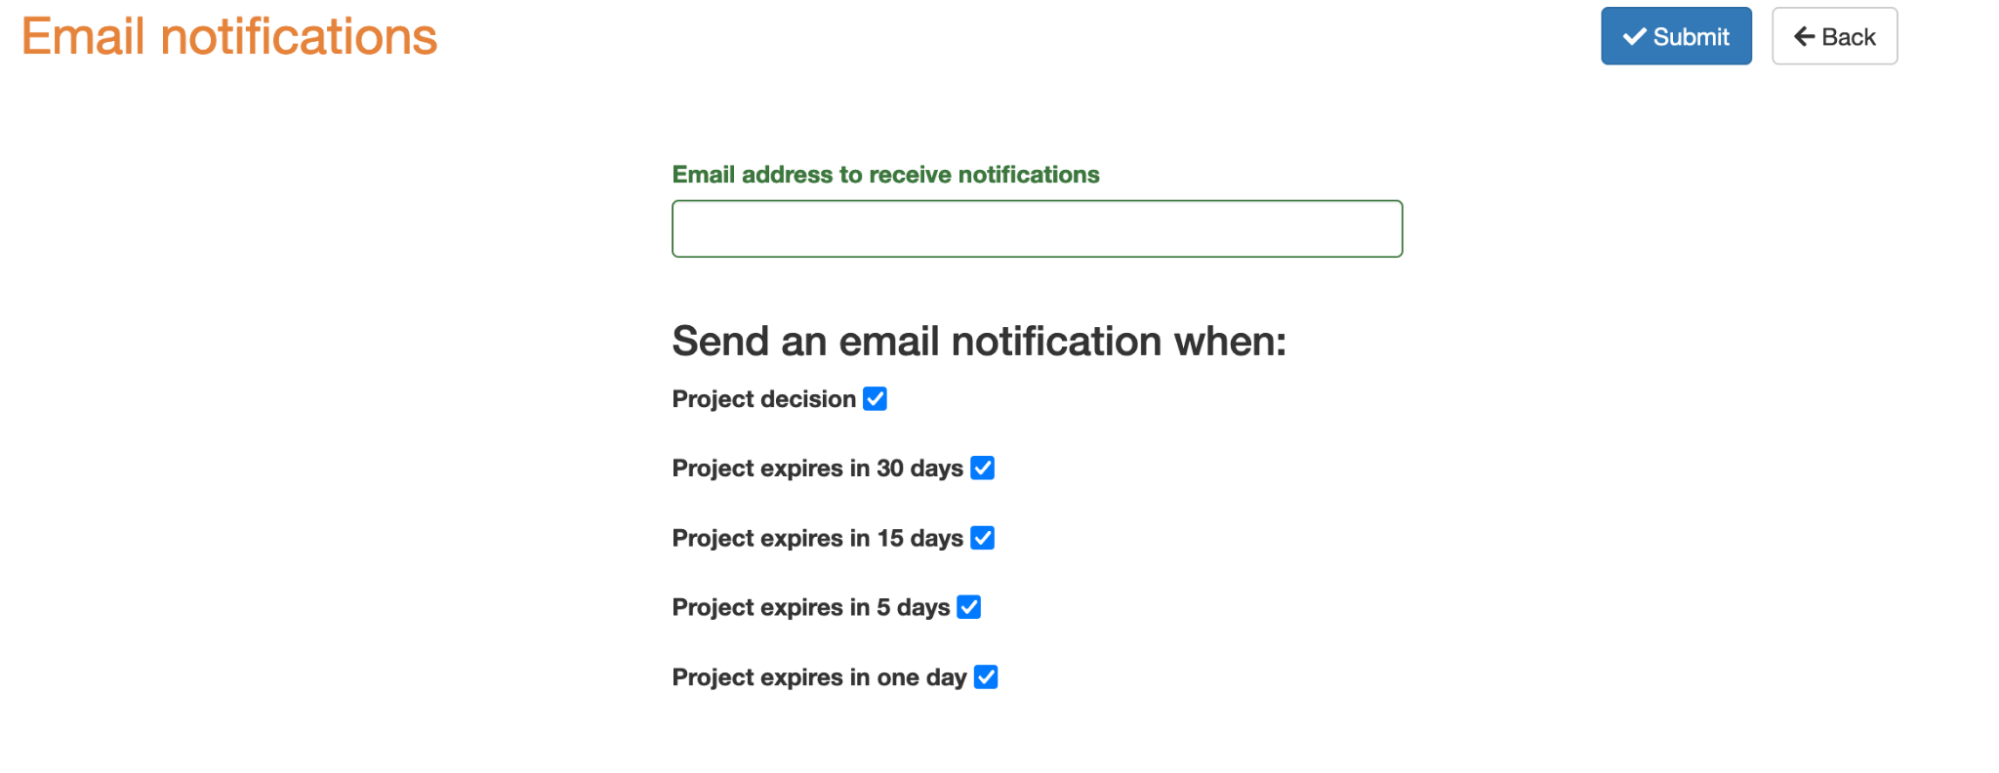
You will need to enter the e-mail address on which you would like to receive notifications and also select which notifications you would like to receive and finally press submit. These settings can be modified at any time.
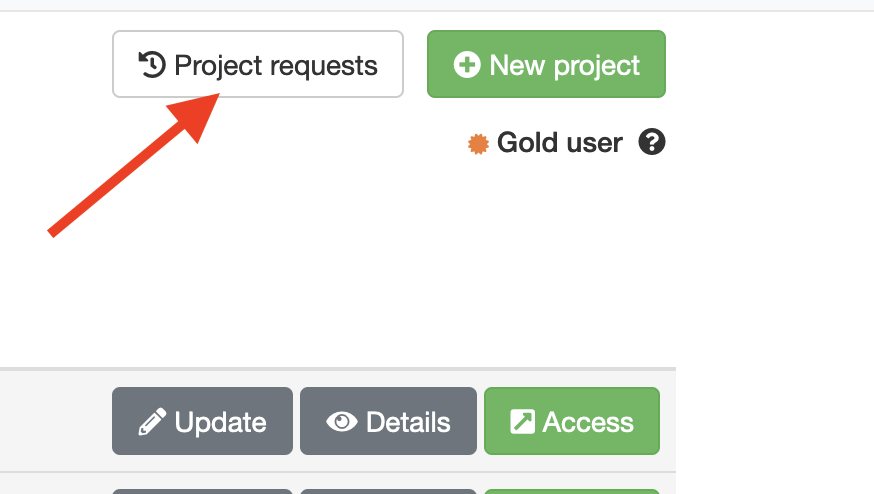
Is there a list of all my previous requests?
On your dashboard, press the “Project requests” button:
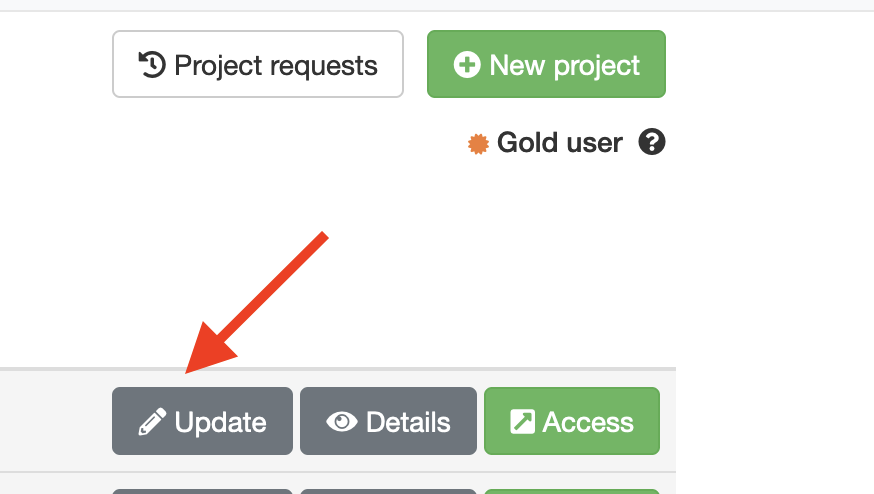
How do I update my projects?
You press the “Update” button for the project on your dashboard:
I forgot to update my project expiration date and it expired. What can I do?
Please contact an administrator and provide the name of your project.

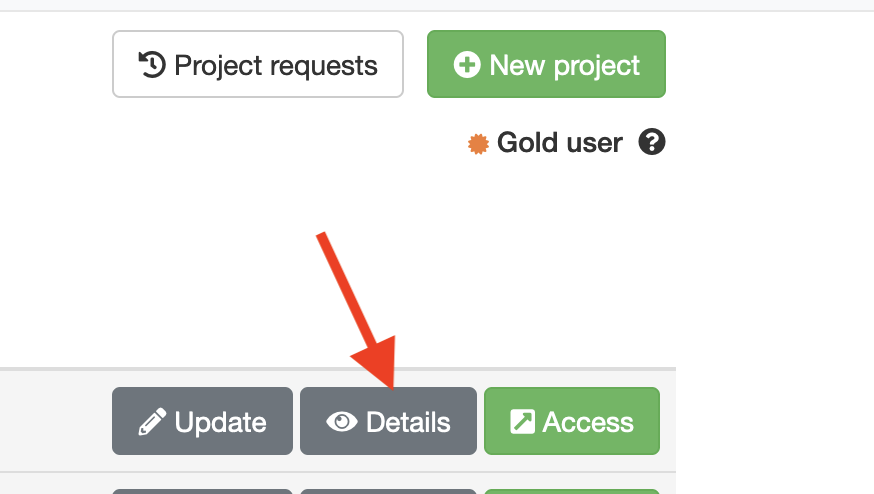
How do I view details about my projects?
You press the “Details” button for the project on your dashboard:
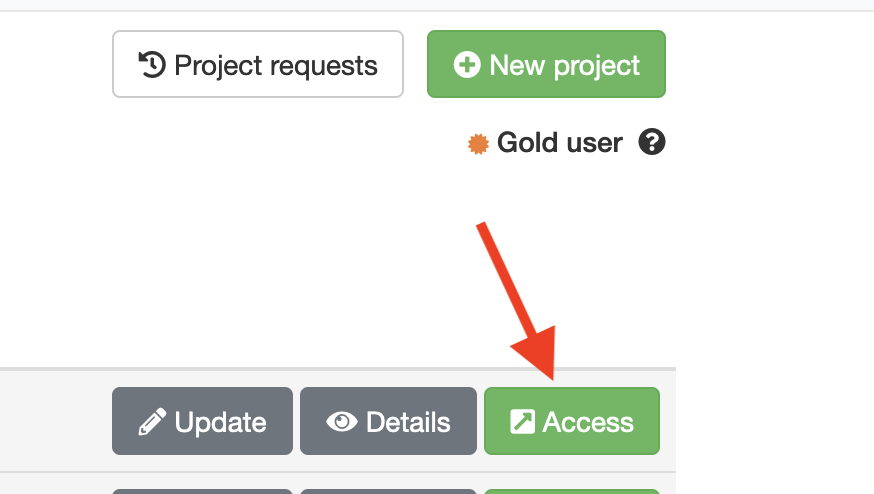
My project was approved. How do I access the resources?
You press the “Access” button for the project on your dashboard:
How do I create a VM (24/7 services, on-demand computation machines)?
You press the “Access” button for the project and then you are transferred to the following page:You press the “Access” button for the project and then you are transferred to the following page:
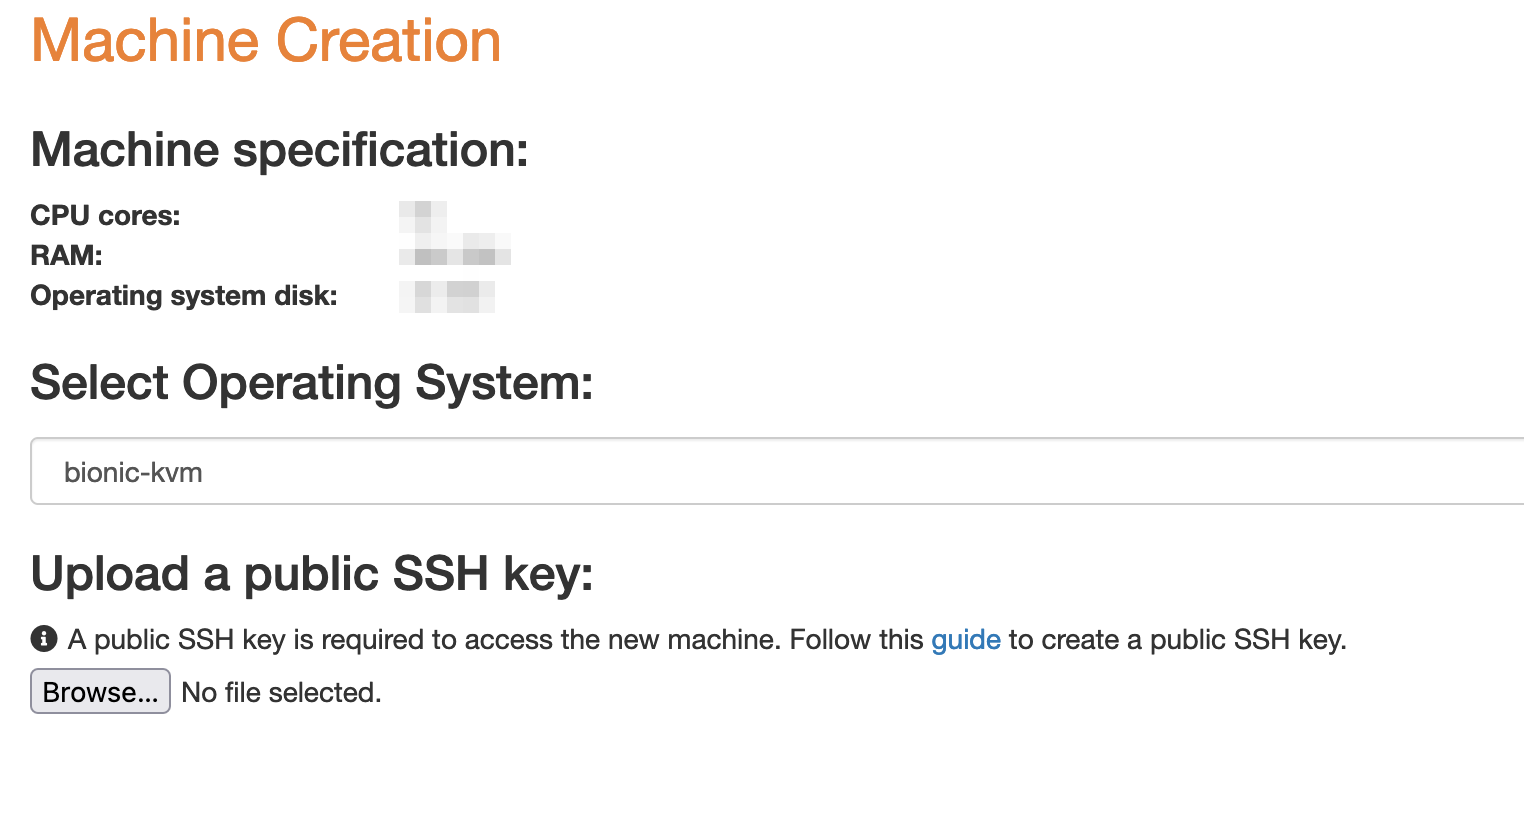
You need to upload a file containing a public SSH key, select the Operating System (OS) image you would like to use from the list and press submit. The creation process may take up to several minutes to complete (especially for windows machines). After the VM is created, you can see its details on the “VM details page” (see below).
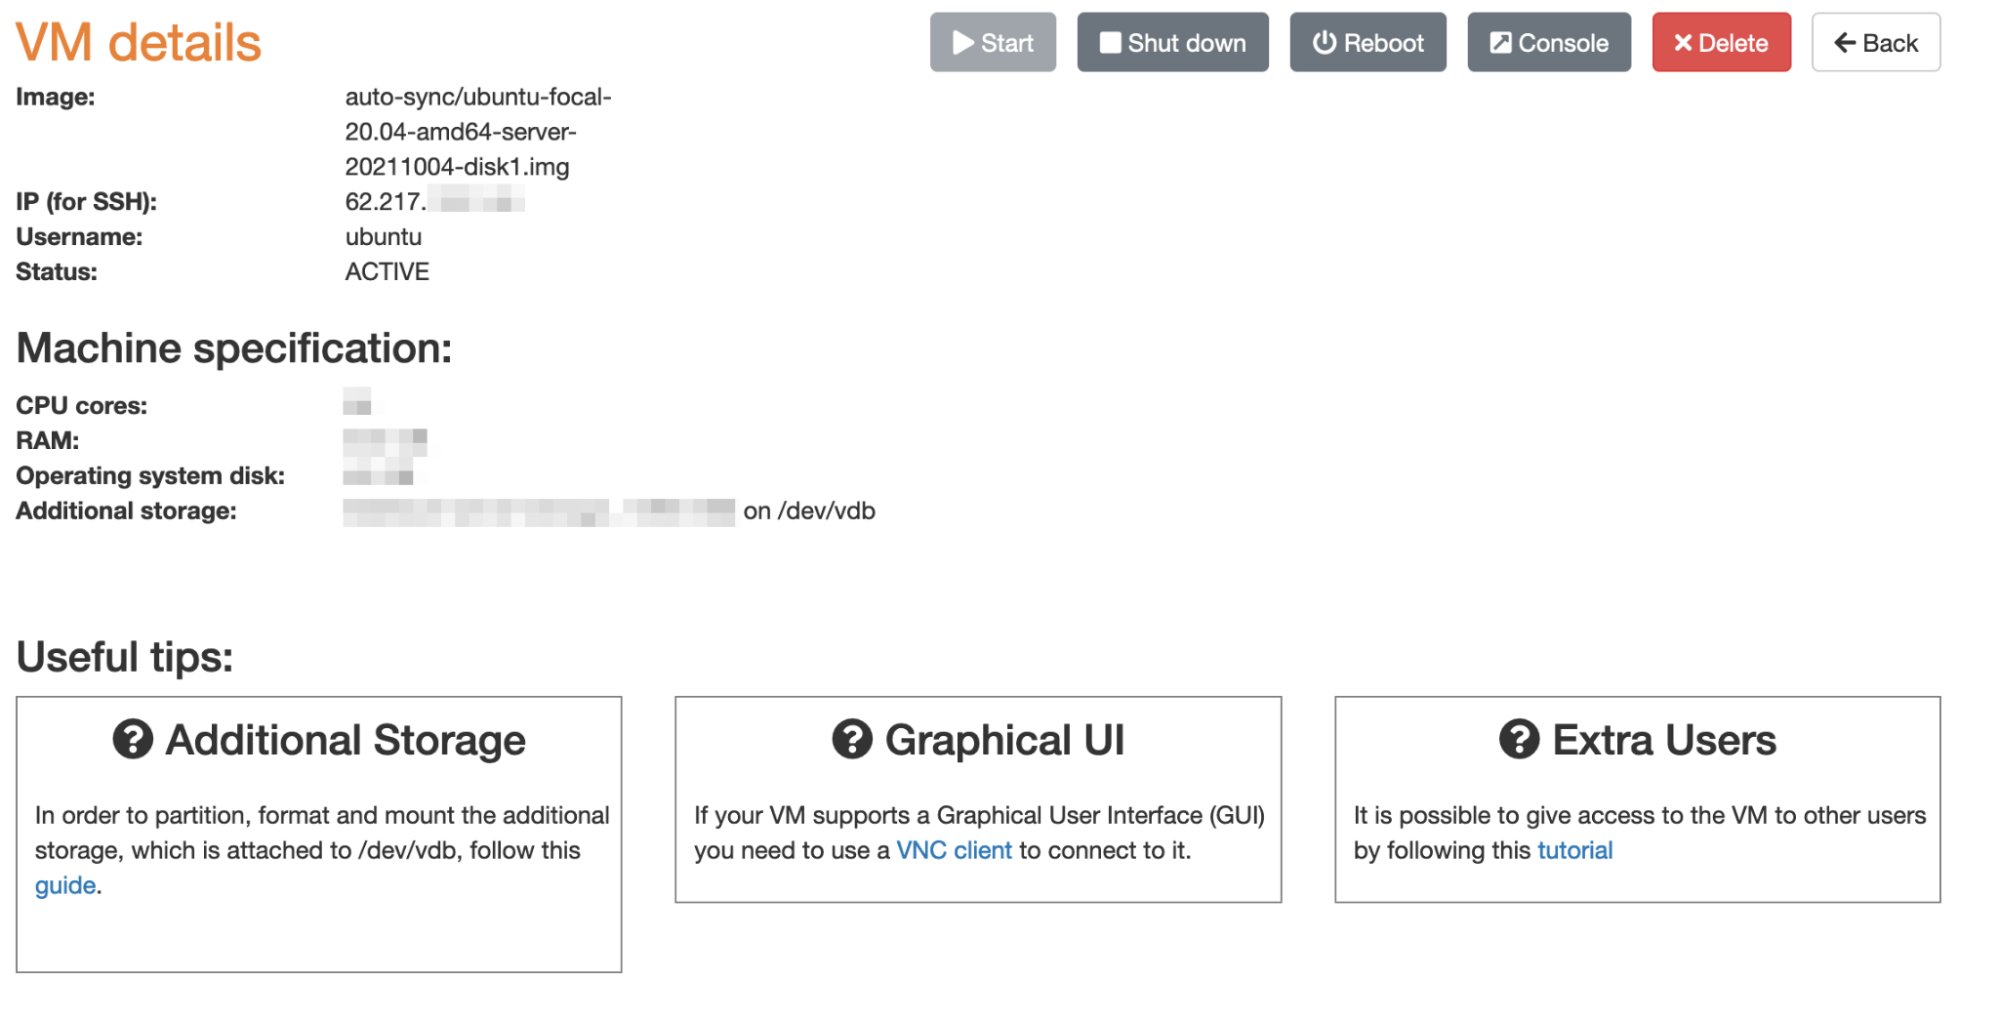
What are the connection details for my VM?
You can view the IP address for the VM, as well as the default username with which the VM can be accessed. Also, you can see the storage that has been attached to the VM and you can shut down, start, reboot and access your VM via Console. Finally, by pressing the delete button you can delete your VM. For VMs using the Windows server OS, you will see a button titled “Retrieve password” where you can retrieve the password for the “Administrator” user. You need to save it because it cannot be retrieved again.
Can I stop/start or reboot my VM?
Yes, you can, by pressing the appropriate buttons on the VM details page.
How do I access my VM via the default console?
Press the appropriate button on the VM details page.
How do I delete a VM?
Press the appropriate button on the VM details page.
How do I activate the copy of Windows Server 2019 on my VM?
You need to acquire a valid Windows Server 2019 Standard Edition licence key. Then you need to open a console on the VM and enter the following command:
DISM /online /Set-Edition:ServerStandard /ProductKey:XXXXX-XXXXX-XXXXX-XXXXX-XXXXX /AcceptEulaWhere XXX is your key. After that, you need to execute:
slmgr /xpr
to check that the OS has been activated correctly.
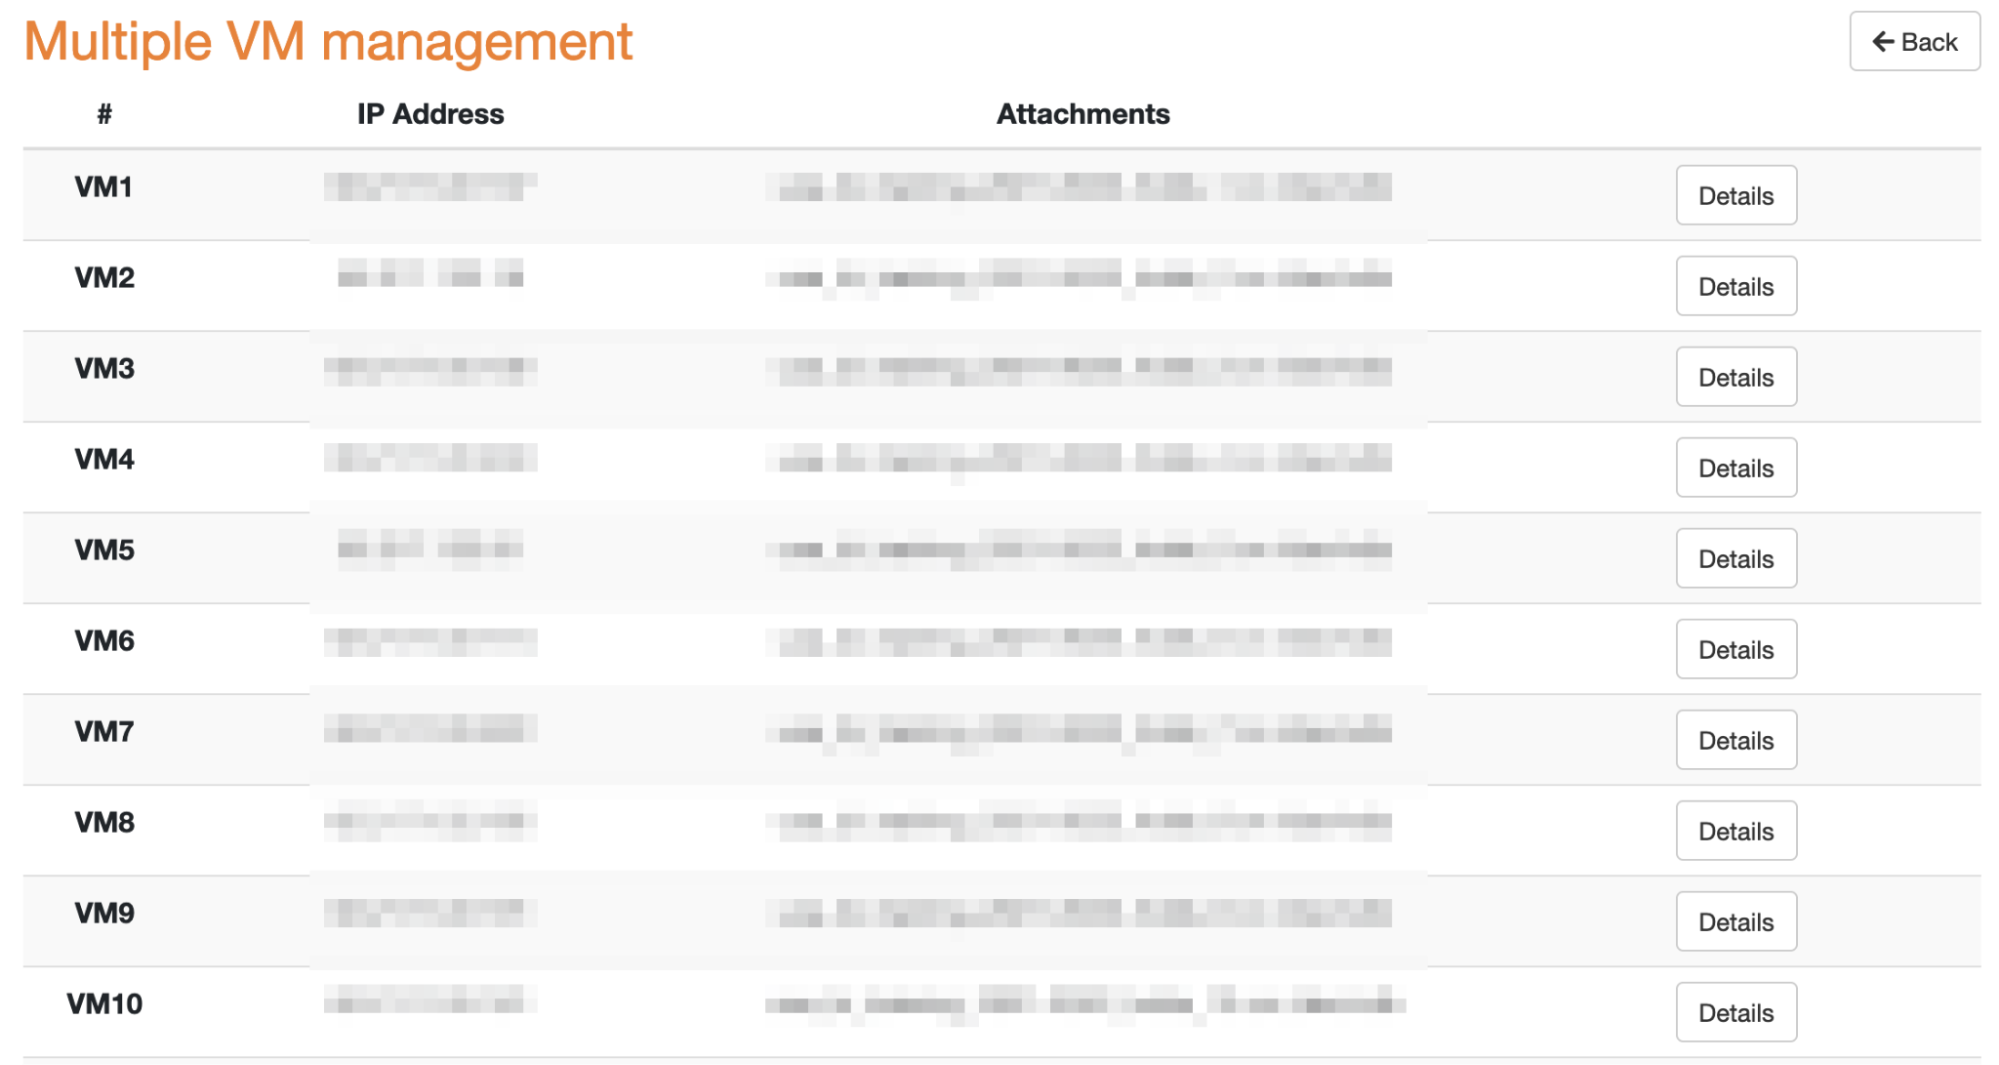
How do I create multiple VMs (On-demand compute machines)?
Press the access button and the following page (where you can create and administer each VM will load:
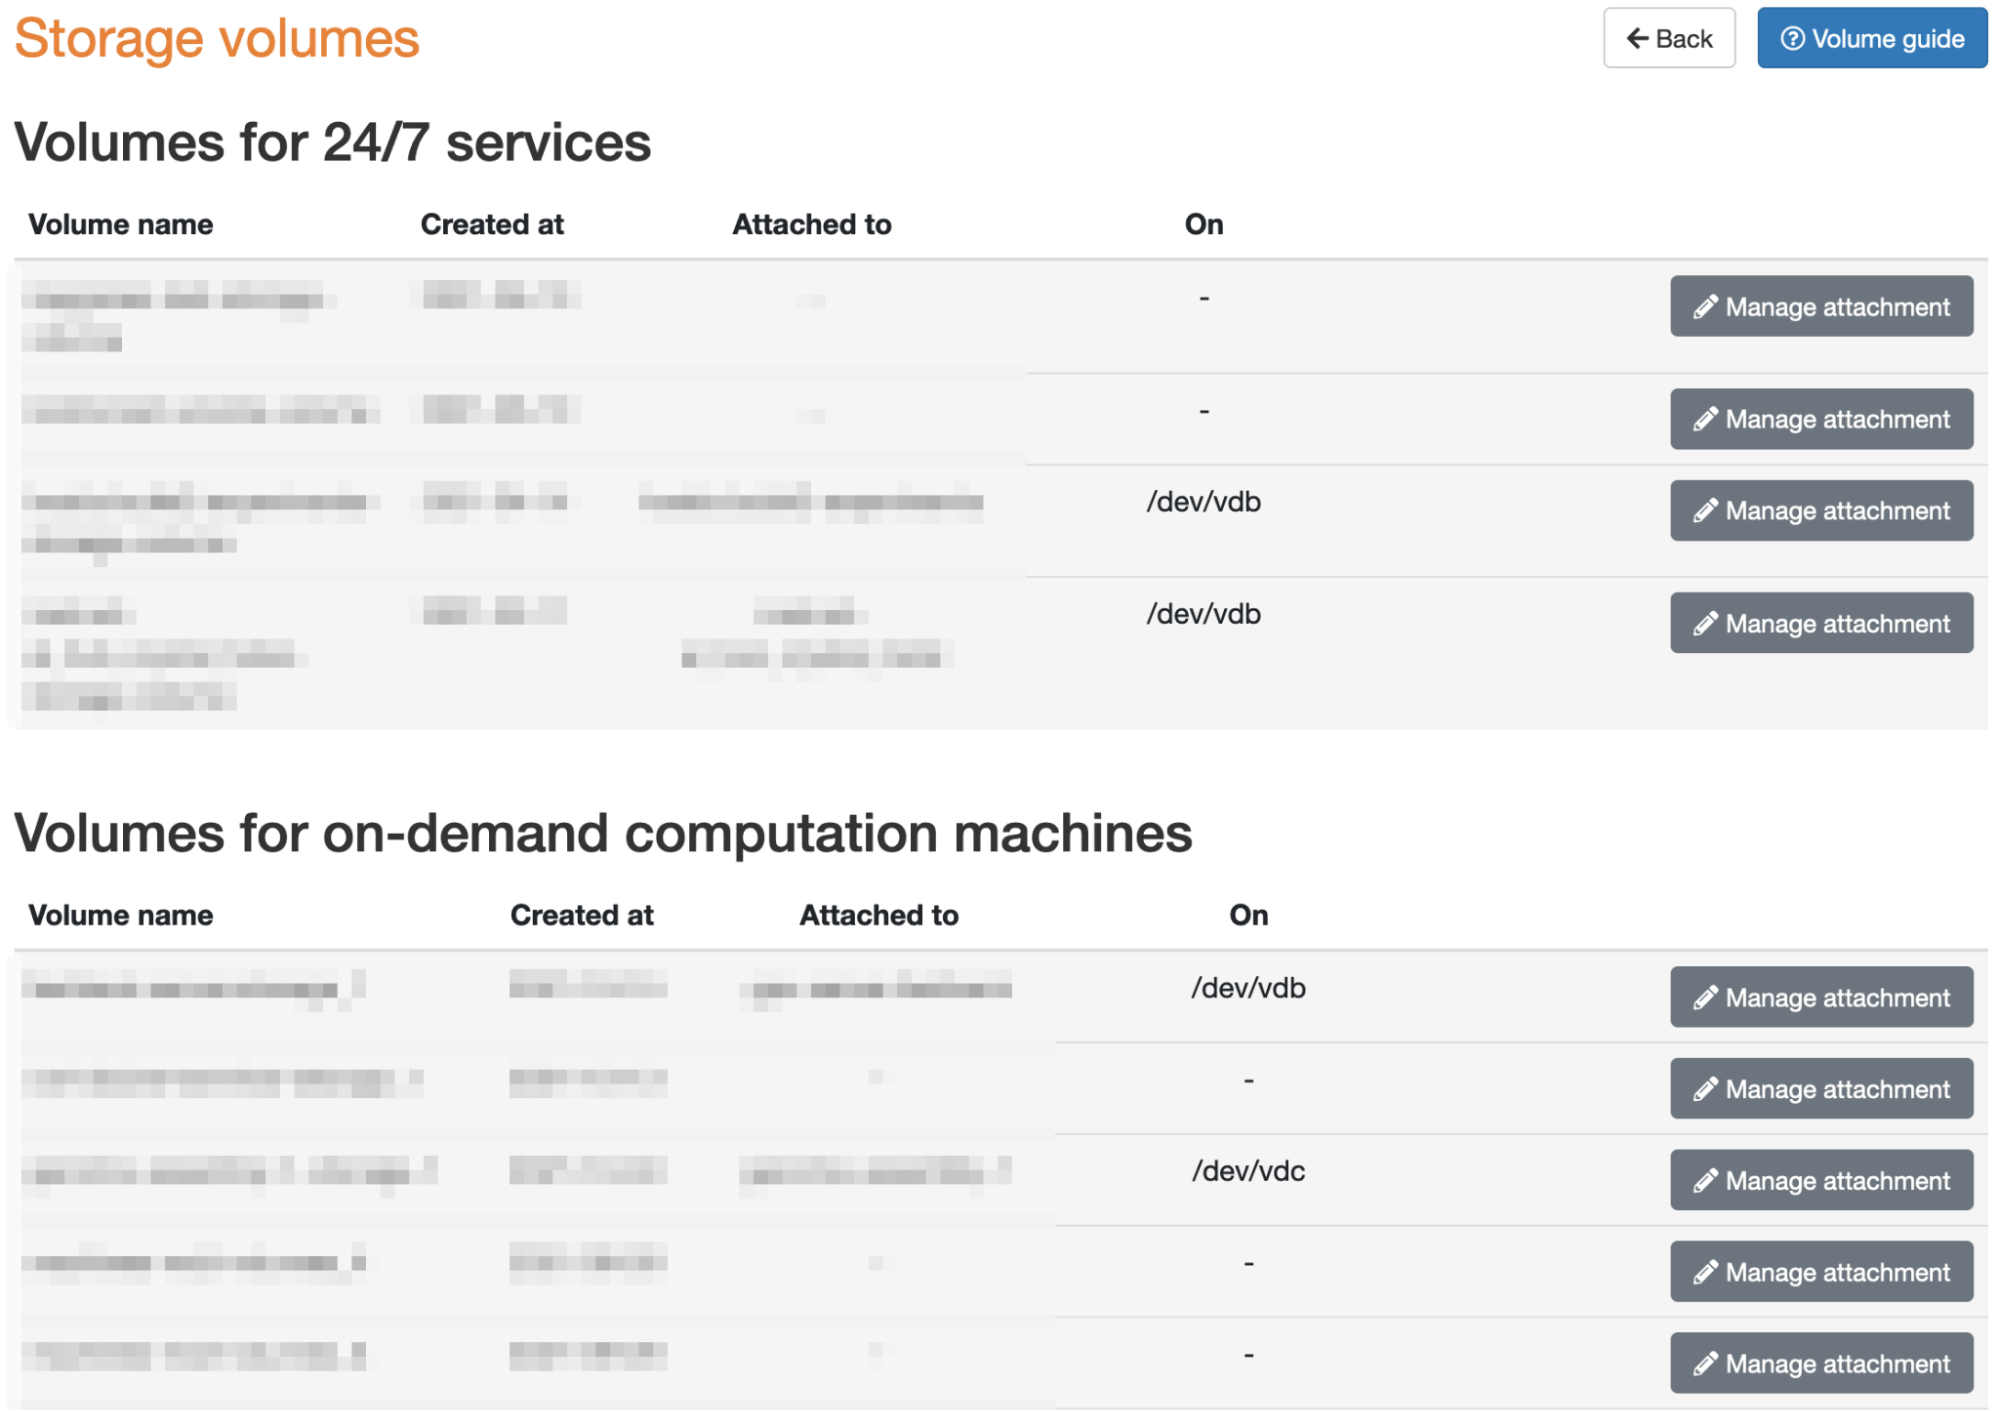
How do I create and delete a volume?
Press the “Access” button for the project and the following page will load:
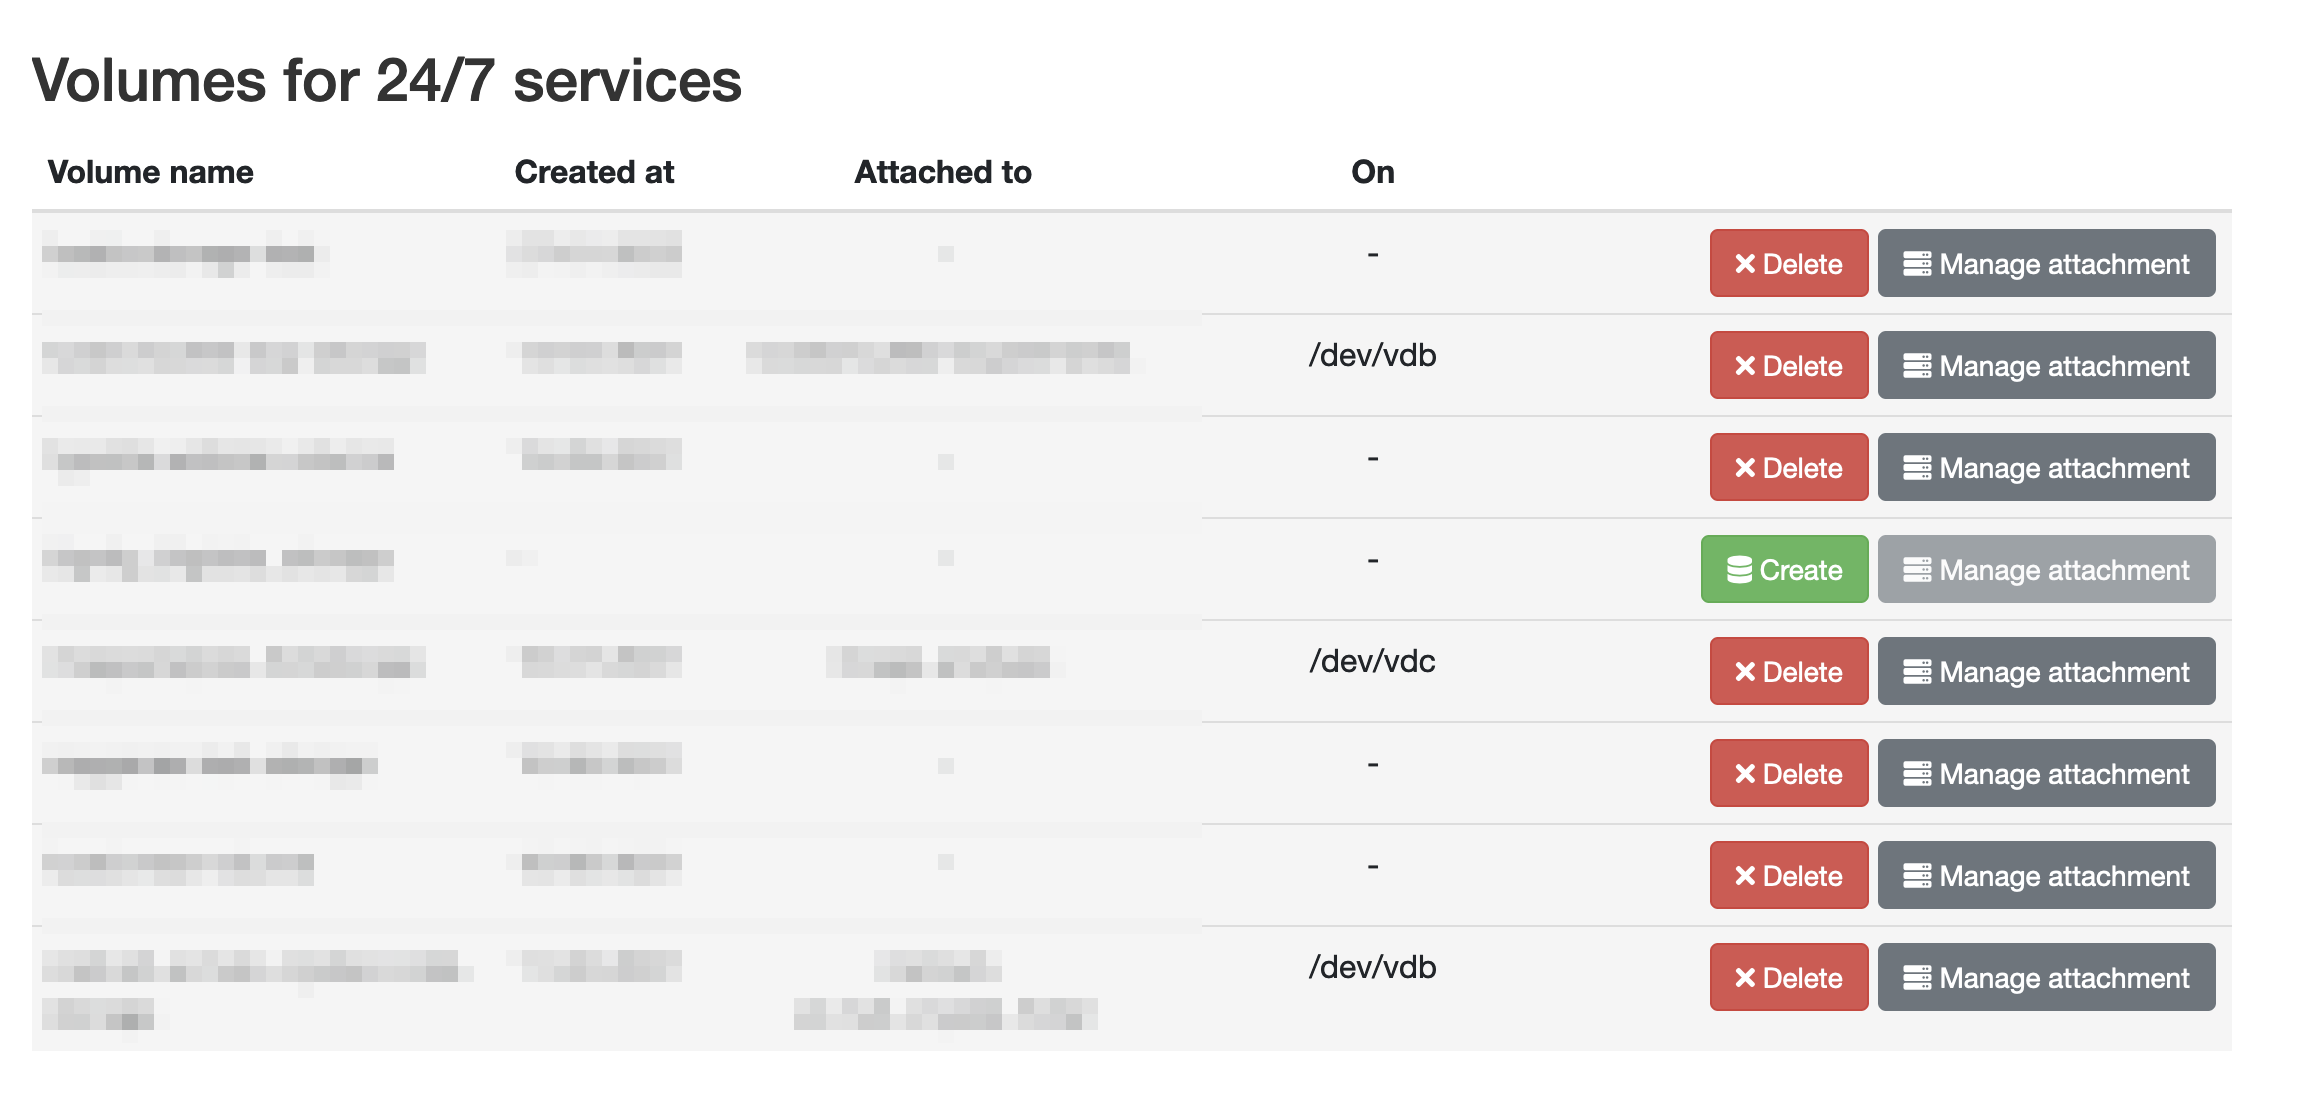
How do I manage volume attachments on my VM?
Press the “Access” button for the project and the following page will load
You can see the name of the volume, the creation date, and which machine to which it is attached. Moreover, by pressing the “Manage Attachment” button, the following page opens:
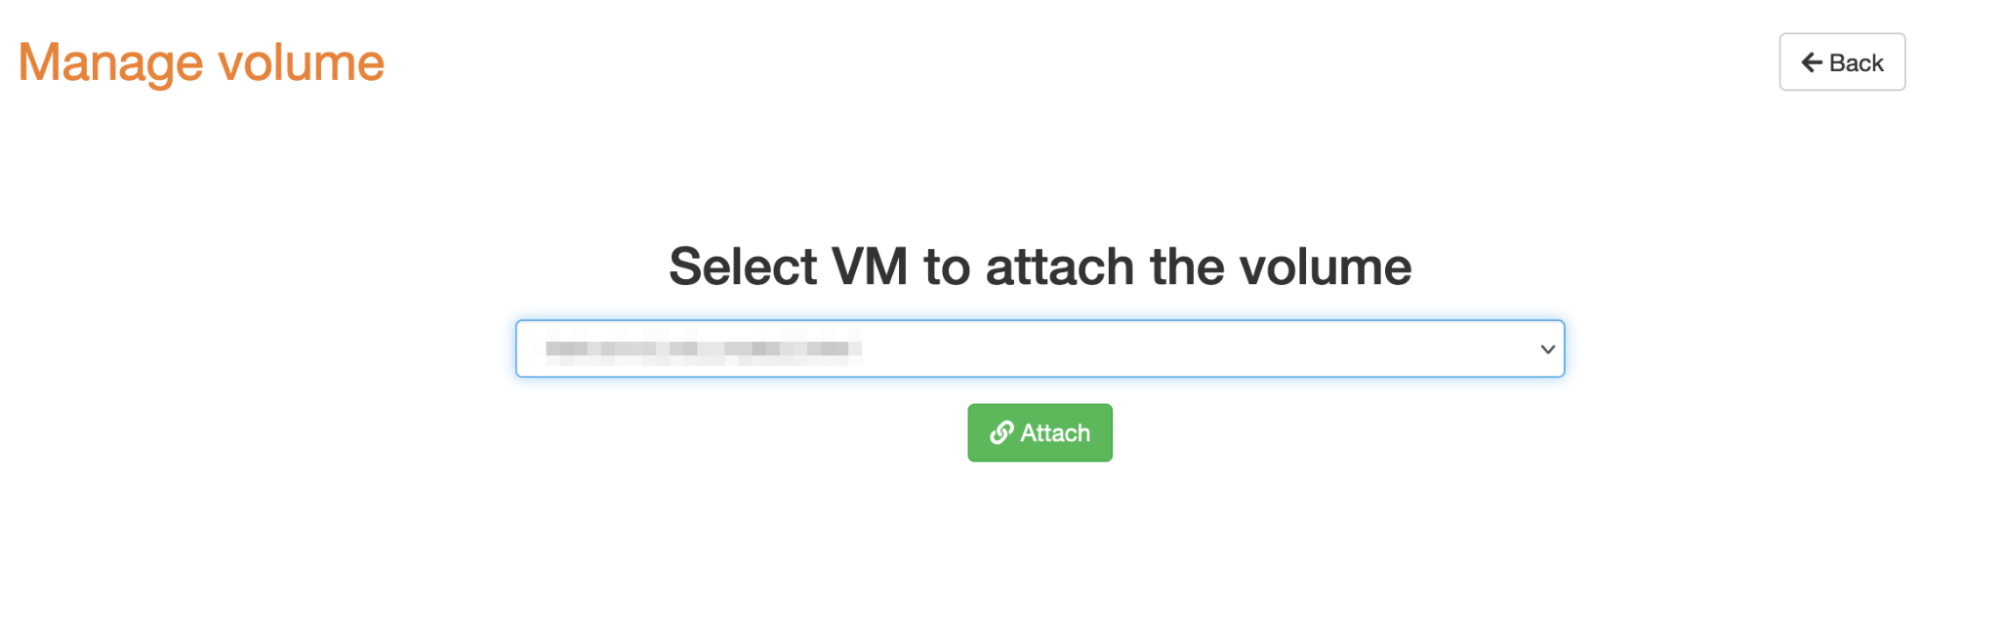
where you can select a VM from the drop-down list to which to attach the volume. If the volume is already attached, you will see the following page:
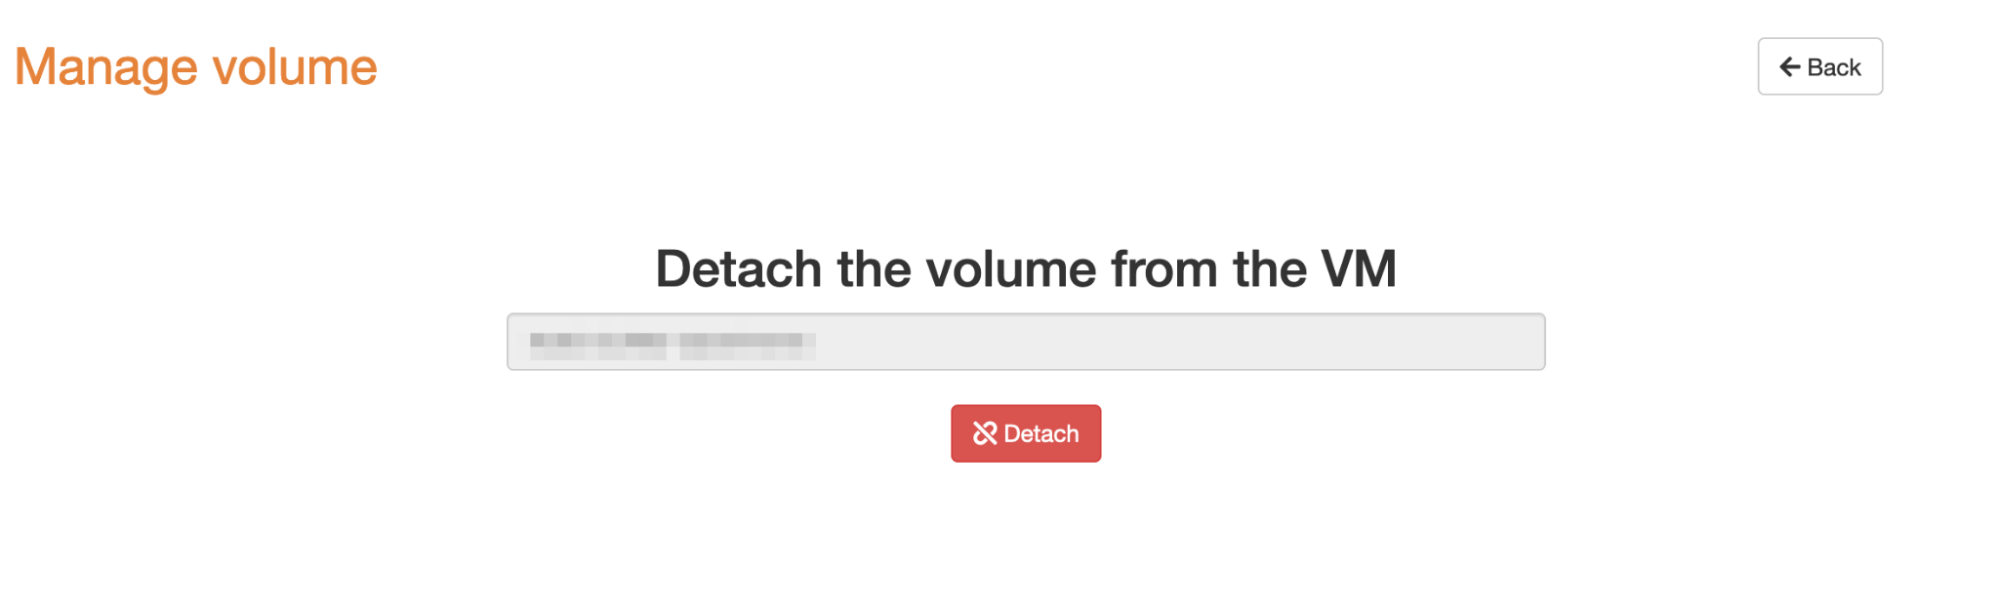
where you can choose to detach the volume from the VM.
How do I resize my volume?
You need to edit the appropriate volume storage project and enter the new value. Then you need to delete and re-create your volume.
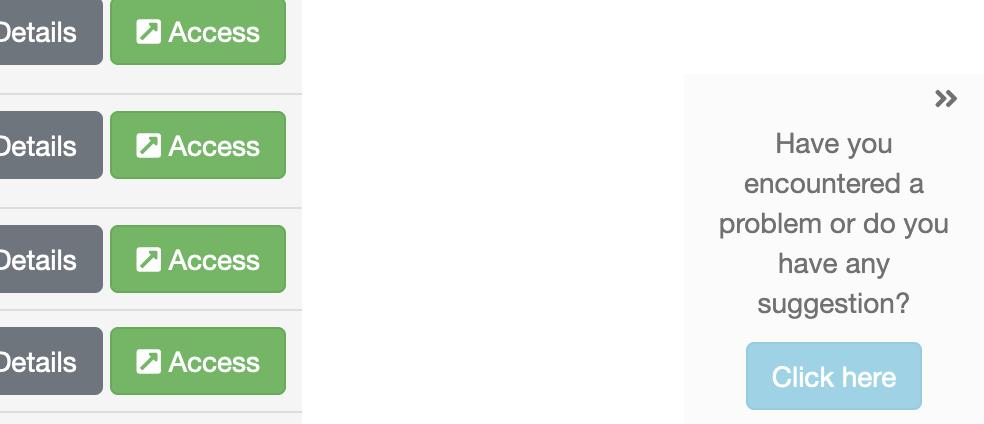
How do I submit a bug, proposed feature or feedback in general?
You can find the bug/suggestion box at the right side of the page:
HYPATIA’s Resource Management & Access Policy
This policy outlines HYPATIA's resource management and access guidelines. Click here to learn more.
Who can use HYPATIA?
Anyone having an active LS AAI account can login to HYPATIA. For details about what an LS AAI account is and how to get one, see below.
What is the LS AAI?
The LS Authentication and Authorisation Infrastructure (AAI) is a Single Sign-On (SSO) service that enables researchers to use their home organization credentials or community or commercial identities (e.g. ORCID, LinkedIn) to sign in and access data and services they need. It also allows service providers (both in academia and industry) to control and manage the access rights of their users and create different access levels for research groups or international projects. This facilitates easy access to LS services and resources for researchers, by removing the need to remember different passwords for each service and instead using their institutional credentials to sign in via their home institution.
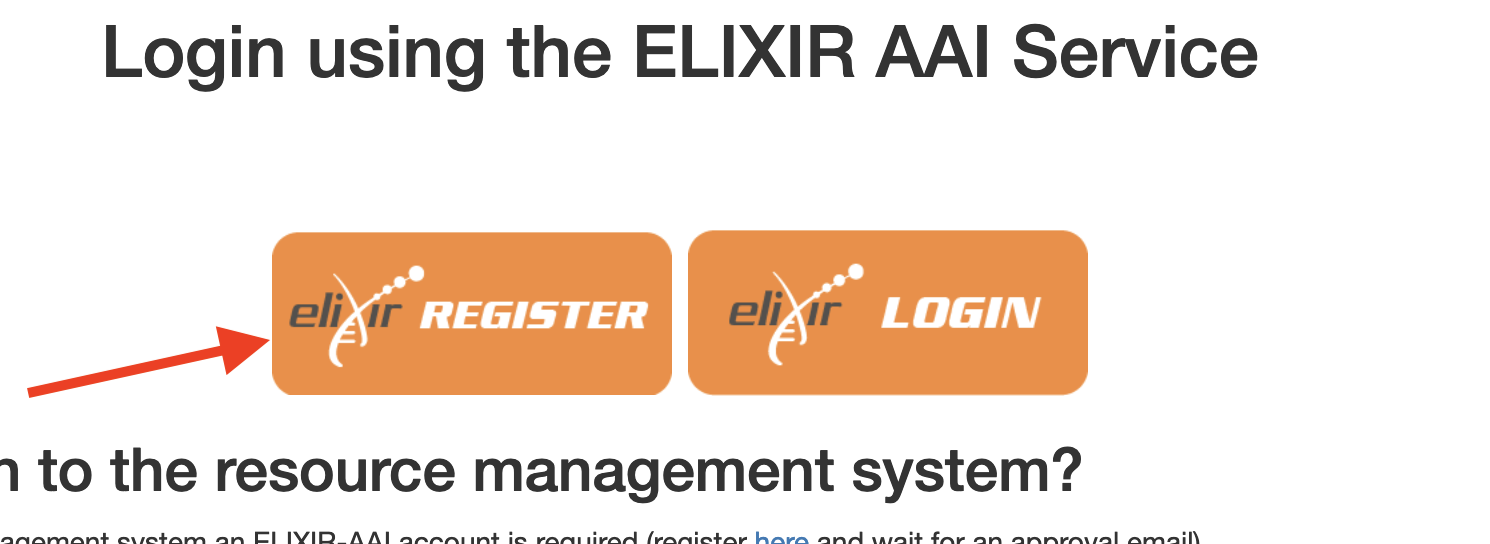
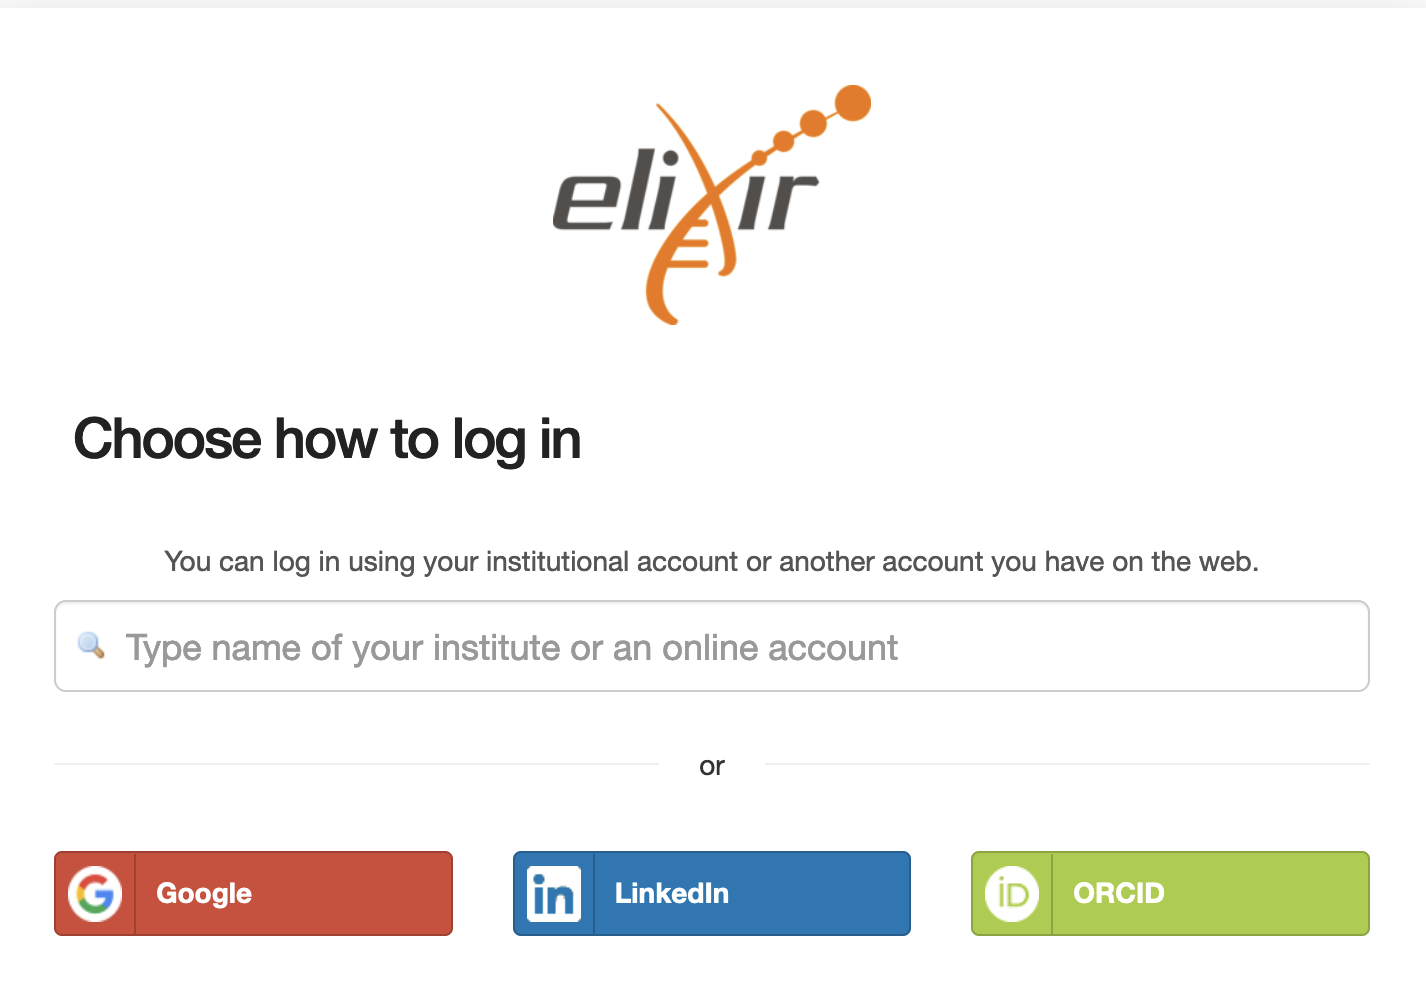
How to create a LS AAI account?

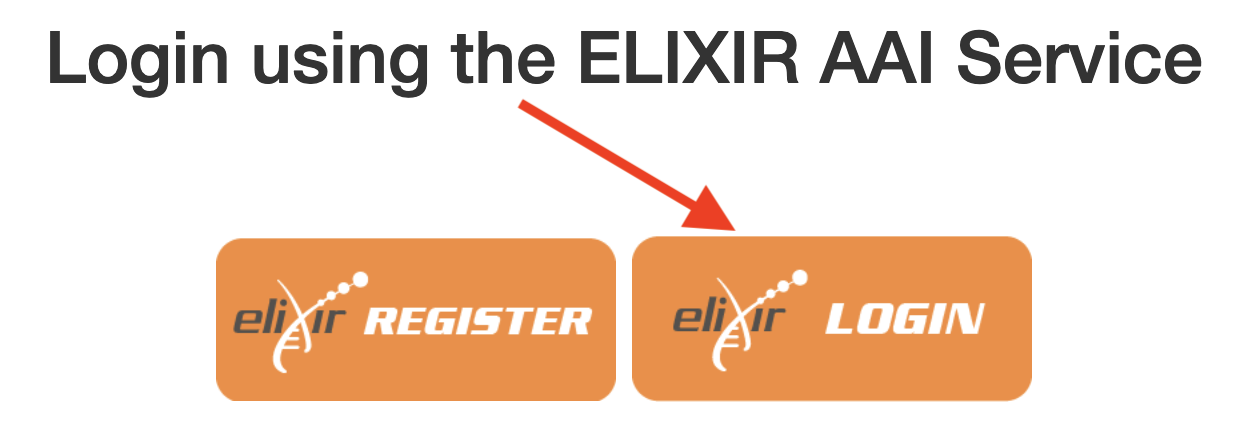
How do I login to HYPATIA using my newly created LS AAI account?

What data do you keep in the HYPATIA database regarding my LS AAI Account?
In accordance with our Privacy policy, the only information stored in our database is your LS AAI username that you selected when you created your account, which is necessary for authentication purposes required by the HYPATIA website. The data are not shared with any third party and you reserve your right to ask for their deletion at any time, in accordance with the GDPR. No other sensitive information regarding your e-mail, institution or other personal information is retrieved from the service.
What happens if I forget my password?
Since we use a Single Sign-On service (SSO) your password is not stored by HYPATIA, but rather by your institution or the service that you use to login to the LS AAI, you need to follow the appropriate procedures of the respective organization to reset your password.